Running a business can be lonely, especially when that business is a business of one. My job doesn’t fit neatly into a box or a word (unless, obviously, that word is “pasta”): Some days I teach, other days I write, and more often I’m hovering over my phone taking pictures of cold food. Only one of these things is an inherently social activity. Which means that when I do find a work friend, it’s a BFD.
It’s been almost a year since I first formally worked with John Welch, the extremely talented craftsman behind John Francis Designs. And in that year John has created pasta tools that have inspired some of my favorite dishes. With each new season comes new work, and with new work comes greater friendship. So much so that when my booked launched last month, John drove down to New York and waited over an hour for a tiny induction burner to boil water so we could cook cavatelli for 40 people. So much so that I’m headed to Boston—where John is based—next month to host our first joint ravioli workshop. (PS: The workshop is sold out, but I’ll be doing a book talk in Boston, too!) It’s great to have work friends (and friend friends) again!
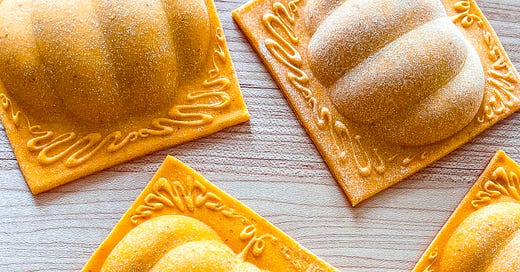
Our latest creation is perhaps my favorite one yet. I am an unashamed “fall girl”—hot coffee, warm sweaters, and pine-scented candles ignite something deep within my soul—and so, naturally, I asked John to design a pumpkin ravioli mold to mark the occasion. I didn’t have any particular vision of what I wanted it to look like, but even if I had, John would have blown it out of the water. This mold is s t u n n i n g. It’s not inspired by the jack-o’-lanterns of Halloween. No, it’s inspired by that moment in Cinderella when an unremarkable pumpkin transforms, with whimsy and grace, into a glorious, princess-worthy chariot. It has depth and swirls and John’s signature Art Deco flair. It’s worth having, even if you never make pasta with it at all.
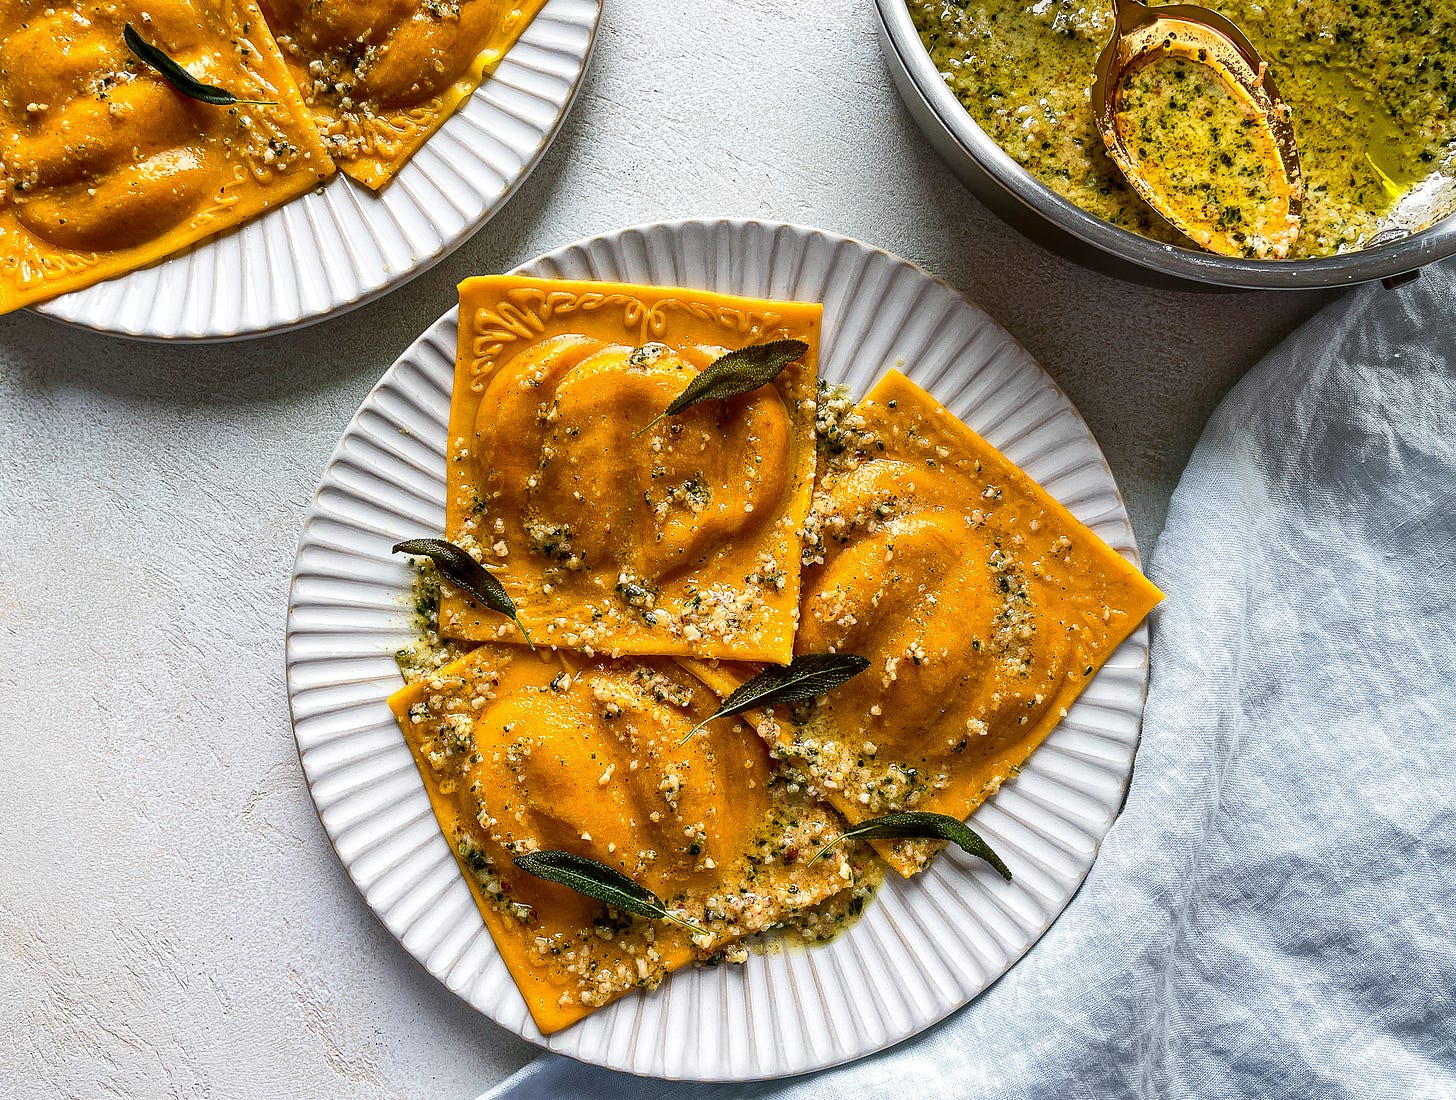
Of course, today I will be making pasta with it, and I’ll show you how to do it, too. Like our spring pea “retro ravioli,” I’m using one ingredient—a can of pumpkin purée—for both the dough and the filling, which imparts Essence of Pumpkin into every delicious crevice (not to mention a burnt orange hue that is currently my entire personality). I served these with the sage and hazelnut pesto from my book, which I’m also including below because I’m feeling extra-generous and extra-excited about this, and fall in general, and I want you to be excited and inspired, too.
Before I go, if you’re entering into your fresh pasta era, or coming out of fresh pasta hibernation, and looking for more fun projects, here’s a recap of John and my creations thus far:
So, what should we make next?
Cinderella’s Pumpkin Ravioli
Serves 4
For the pumpkin, squash & mascarpone filling
600 grams (1.3 pounds; about 2 medium) honeynut squash, halved and deseeded*
15 ml (1 tablespoon) extra-virgin olive oil
Kosher salt and freshly ground black pepper
200 grams (¾ cup plus 1 tablespoon) pumpkin purée, blotted with a few changes of paper towels to remove excess moisture
45 grams (3 tablespoons) mascarpone
45 grams (1½ ounces) finely grated Parmigiano-Reggiano
Whole nutmeg
*I prefer honeynut for its flavor and texture, but any sweet winter squash will work.
For the pumpkin pasta dough
150 grams (⅔ cup) pumpkin purée
50 grams (about 1 large) egg
60 grams (about 3 large) egg yolks
350 grams (about 2¼ cups) ‘00’ flour or all-purpose flour
50 grams (about 5 tablespoons) semola rimacinata or semolina flour
For the sage & hazelnut pesto
70 grams (½ cup) raw hazelnuts
60 ml (¼ cup) extra-virgin olive oil, plus more as needed
5 grams (¼ cup; about 15 large leaves) fresh sage leaves, roughly chopped
2 garlic cloves, thinly sliced
1 teaspoon honey, plus more to taste
20 grams (¾ ounce) finely grated Parmigiano-Reggiano
10 grams (2 tablespoons) finely grated Pecorino Romano
Kosher salt and freshly ground black pepper
For serving
Fresh sage leaves, fried in butter or olive oil until crisp and drained on a paper towel
Finely grated Parmigiano-Reggiano
Extra-virgin olive oil
Equipment
Work surface, preferably wooden
Manual pasta machine or electric pasta roller attachment
Sharp knife or pasta wheel
Pumpkin ravioli mold (or any of John’s beautiful molds!)
Pastry brush (optional)
Rolling pin
For the filling
Heat the oven to 400°F. Coat the squash with oil, salt, and pepper, and arrange cut-side down on a parchment-lined sheet pan. Roast, flipping halfway through, until very tender and easily pierced with a knife, about 45 minutes. Let cool completely, then scoop out the flesh and blot dry with paper towels.
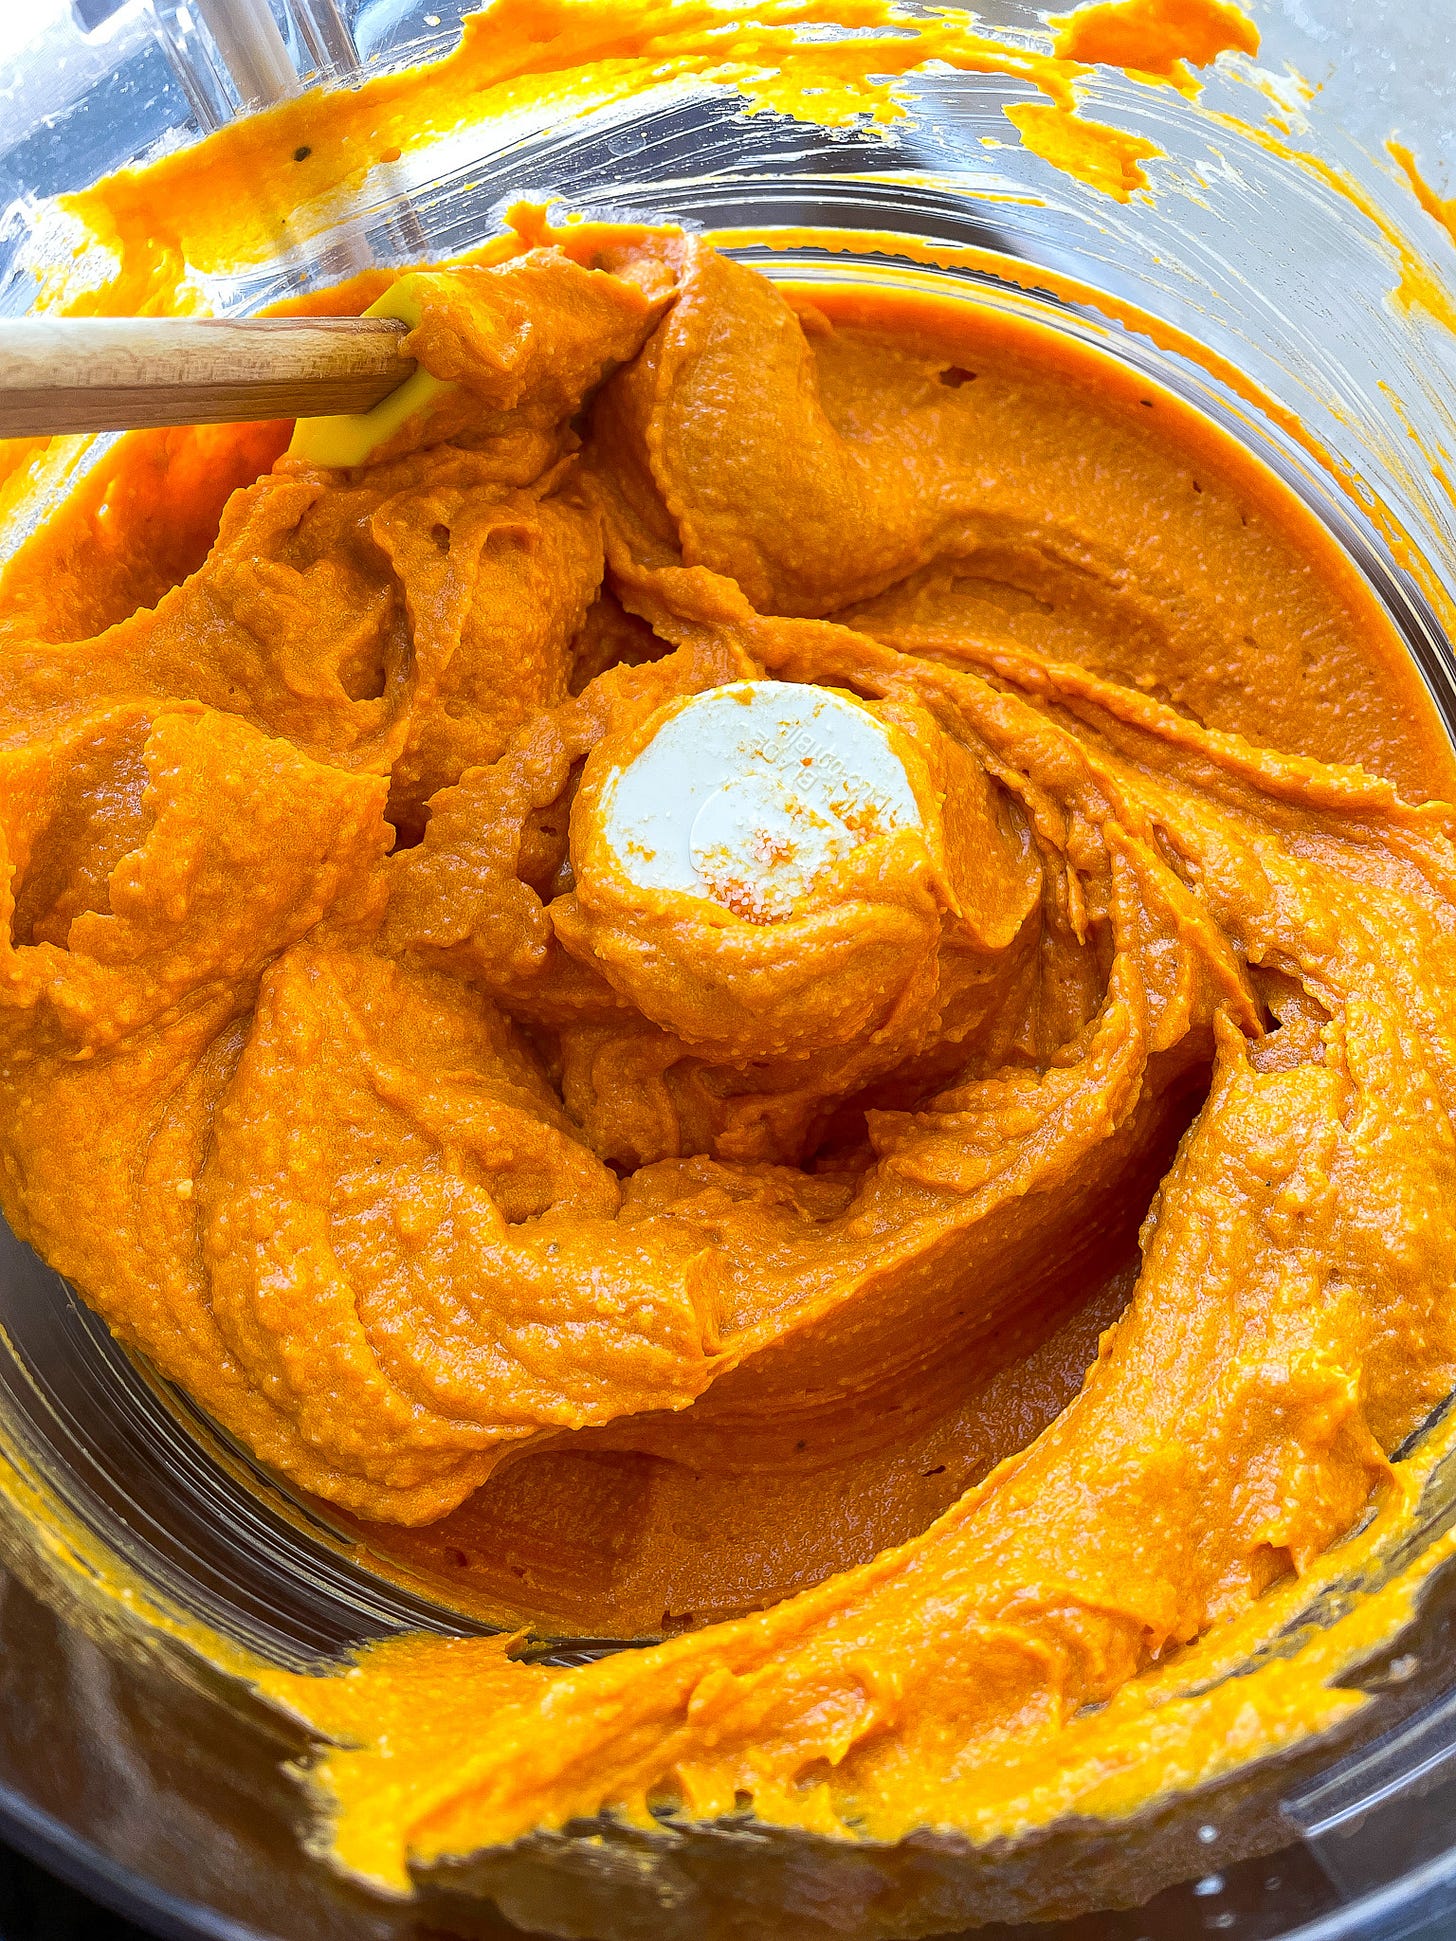
Add the squash, pumpkin purée, cheeses, and a generous grating of nutmeg to a food processor. Pulse until smooth and season to taste with salt—if you’d like a sweeter filling, add a drizzle of honey or a pinch of sugar to taste.
Transfer the filling to a bowl or piping bag and chill for at least 1 hour or until ready to use.
For the pasta dough
Whisk together the pumpkin purée, egg, and yolks. Make the dough by hand or in a food processor according to the directions in this post. Let the dough rest, tightly covered, at room temperature for at least 30 minutes and up to 2 hours.
For the pesto
Heat the oven to 375°F. Spread the hazelnuts on a small foil-lined sheet pan. Toast in the oven until golden and fragrant, watching closely, 8 to 10 minutes. When cool enough to handle, bundle the hazelnuts in a clean dishcloth and rub them together vigorously to remove most of the skins.
In a small skillet, warm the oil over medium-low heat. Add the sage and garlic and cook, stirring occasionally, until sizzling and fragrant but not browned, about 5 minutes. Let the mixture bubble for a minute or two, stirring often, then turn off the heat and let cool slightly.
Add the hazelnuts to the bowl of a food processor and pulse until chopped into a coarse sand consistency. Add the garlic-sage mixture, along with the honey, and pulse into a coarse paste, scraping down the sides of the bowl as needed. Transfer to a bowl and stir in the cheeses, then loosen with another tablespoon or two of oil. Season to taste with salt and pepper and add more honey if you’d like.
For the ravioli
Set up your workspace and roll the pasta sheets according to these instructions. For these ravioli, I rolled the dough to setting 6 for both a Marcato Atlas 150 and KitchenAid machine.
Cut the pasta sheet into sections:
Trim any uneven edges from the pasta sheet (you can ball up the scraps, cover them, and reuse them after the fresh dough is gone). Cut the sheet into pieces that are slightly larger than the size of the mold (in this case, about 5 inches).
Assemble the ravioli:
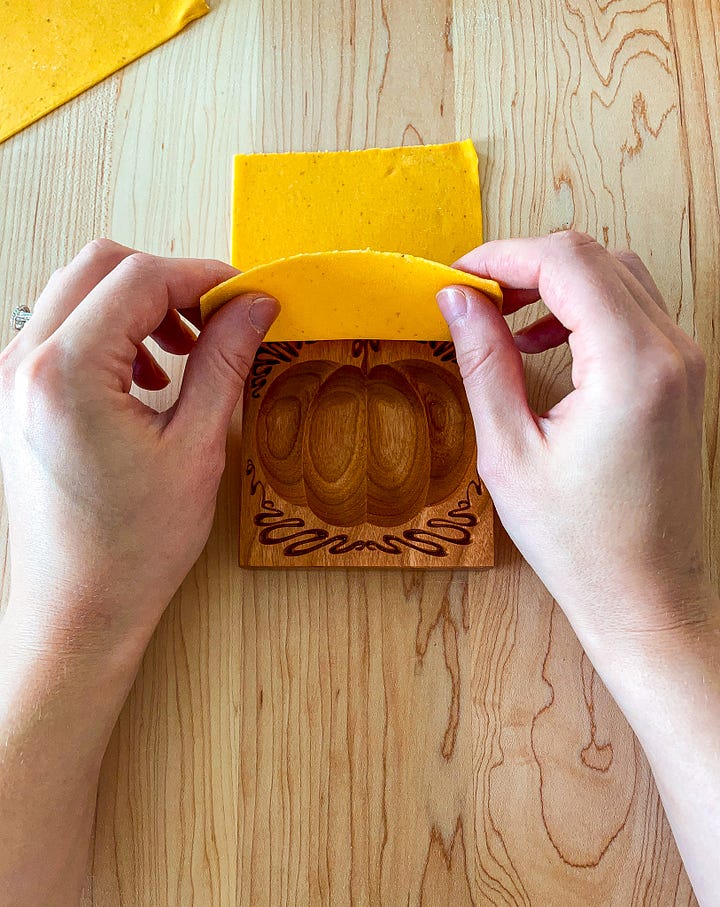
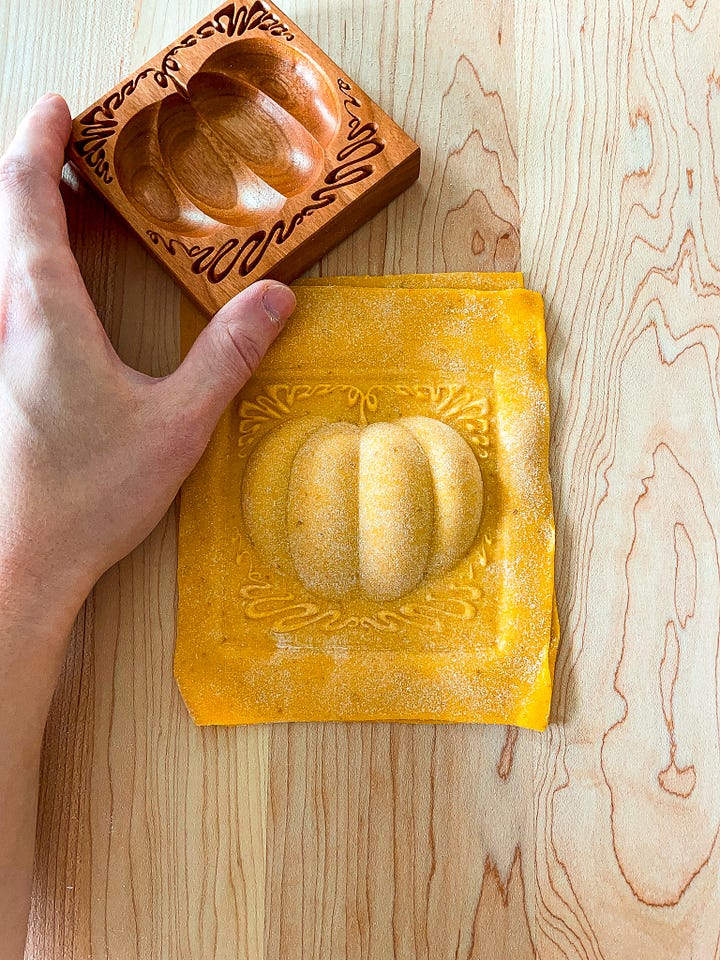
Lightly dust one side of one of the pieces with ‘00’ or all-purpose flour and cover the remaining rectangles with a damp dishcloth so they don’t dry out. Position the rectangle floured-side down on top of the ravioli mold.
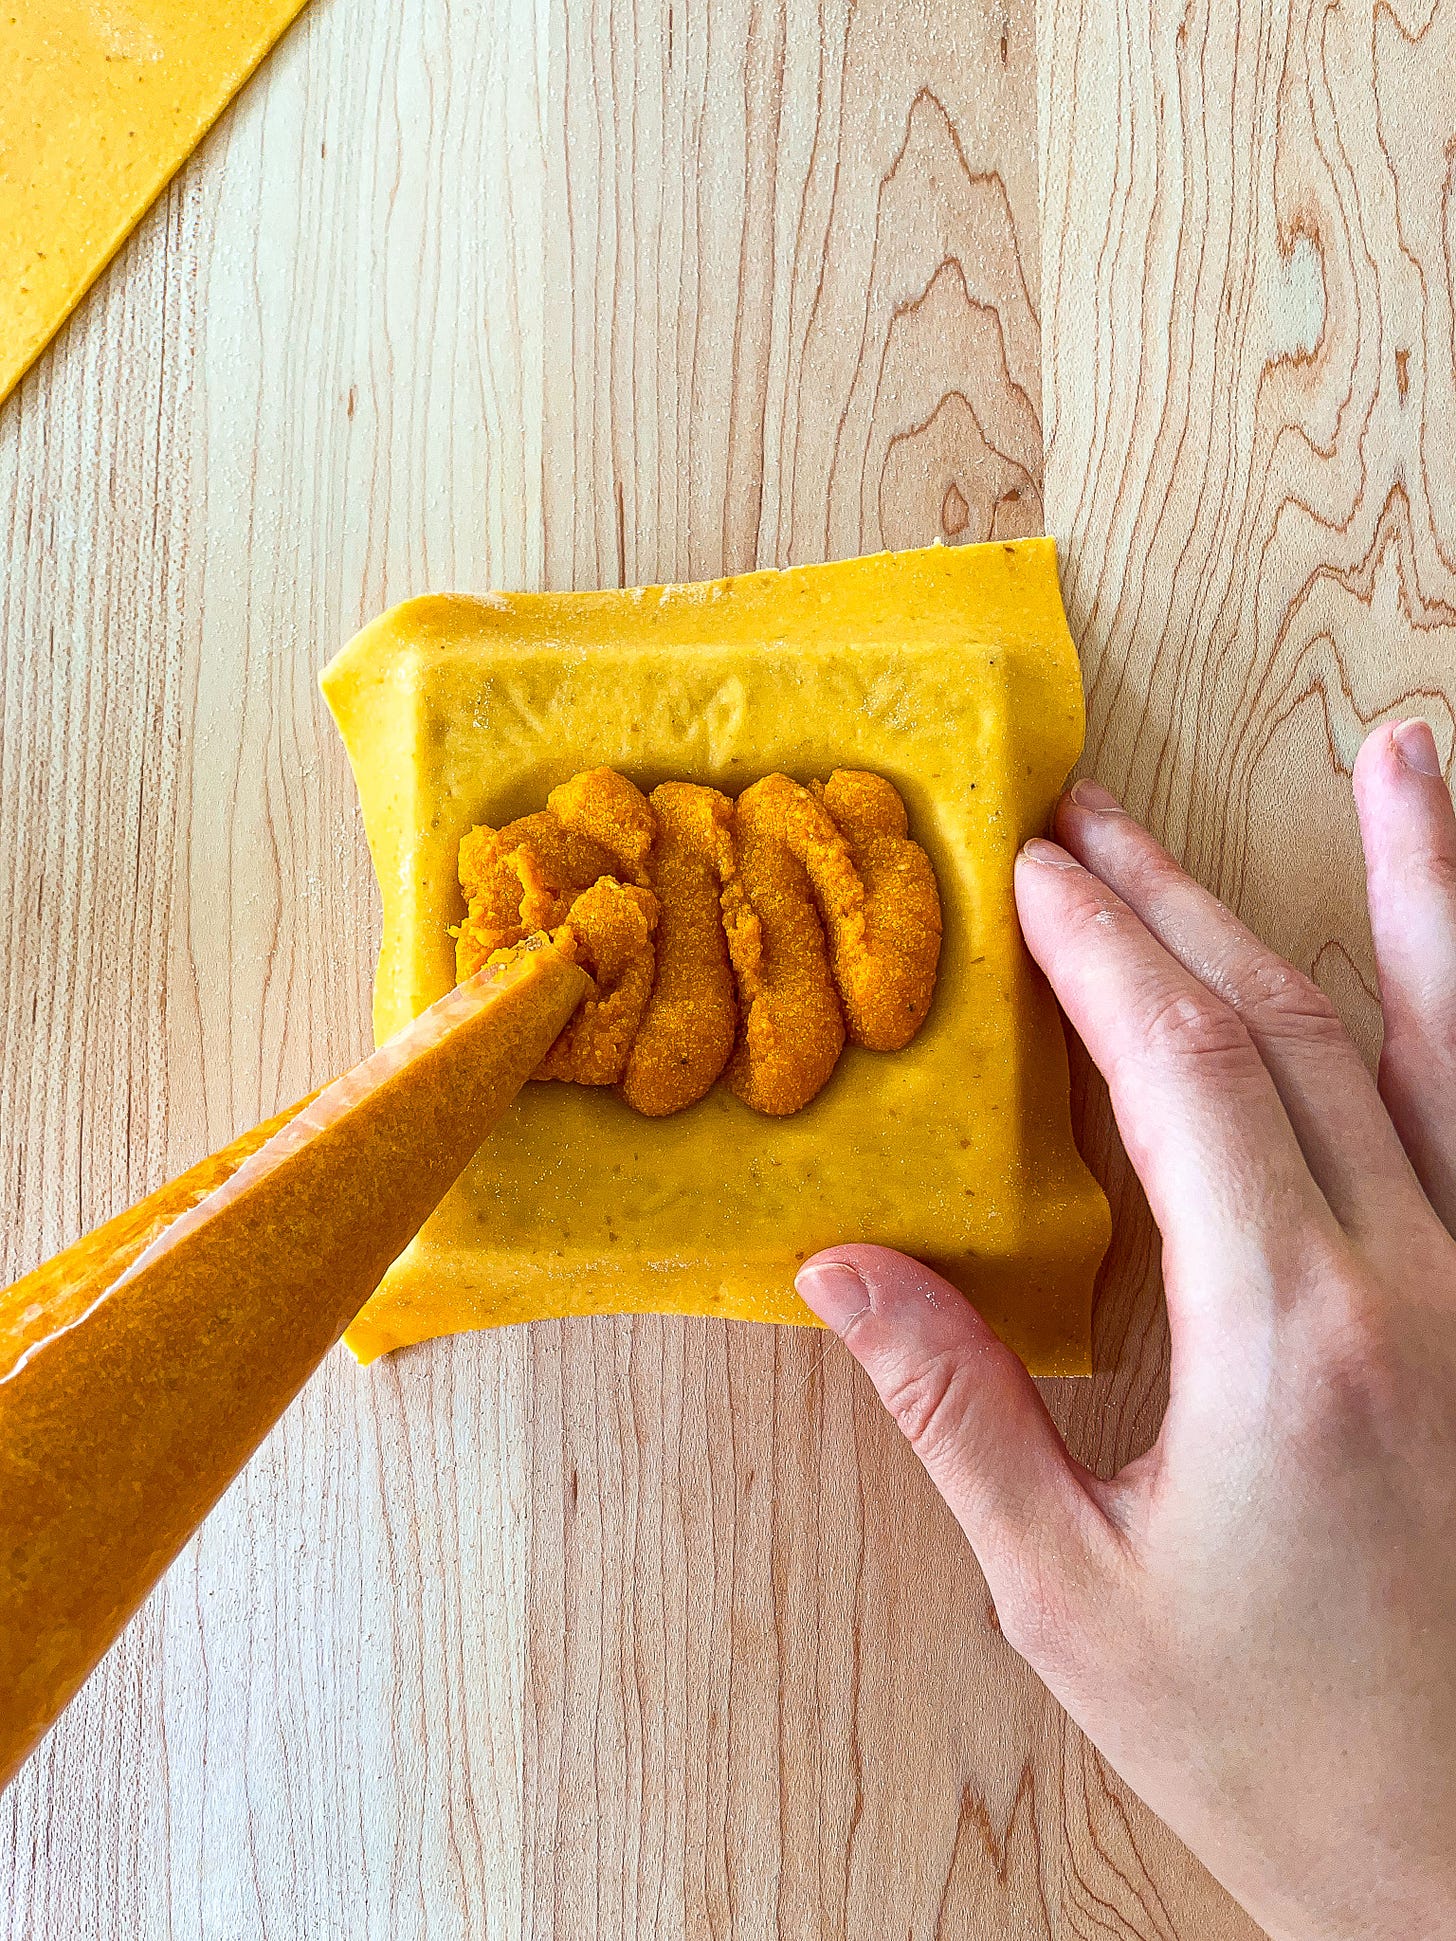
Using your fingers, a large clean paint brush, or a pastry brush, gently press the pasta into the mold, making sure to push into the filling pocket and paying particular attention to the carved details. It’s okay if the pasta doesn’t reach the bottom of the filling nook—the filling itself will do that for you later.
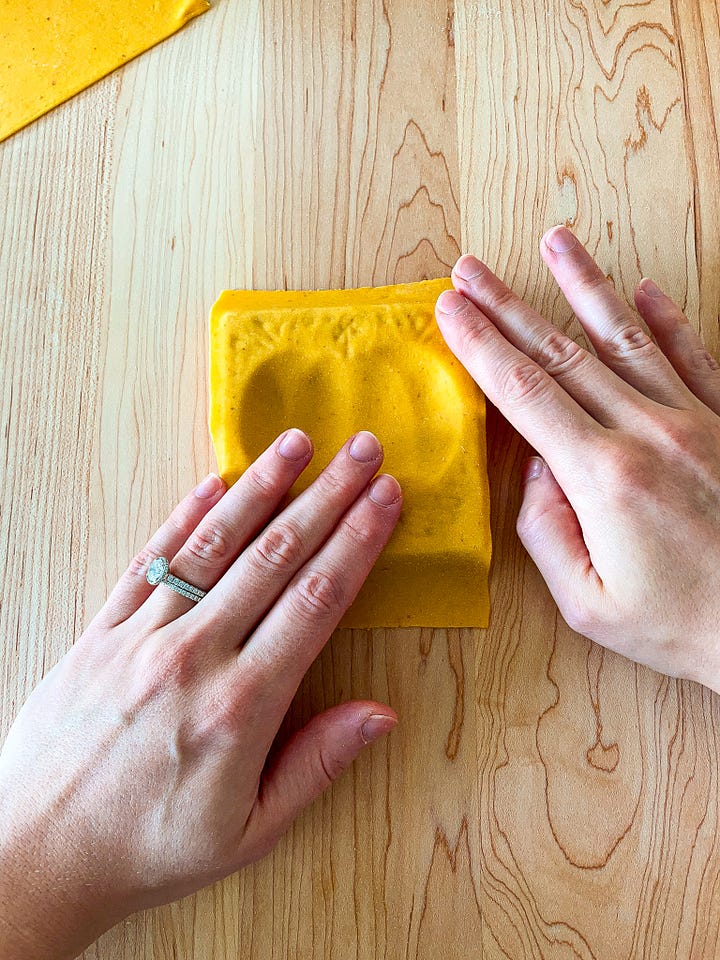
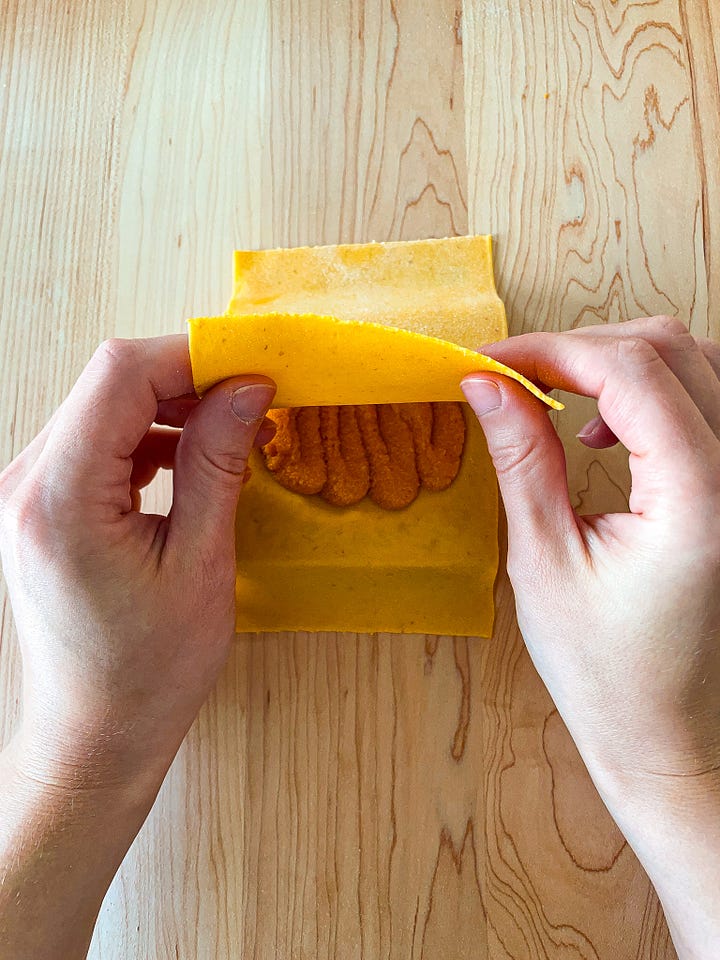
Pipe or spoon some filling into the filling pocket—don’t worry if it pops up above the mold a little. Use your finger or a pastry brush to brush a little water around the edges.
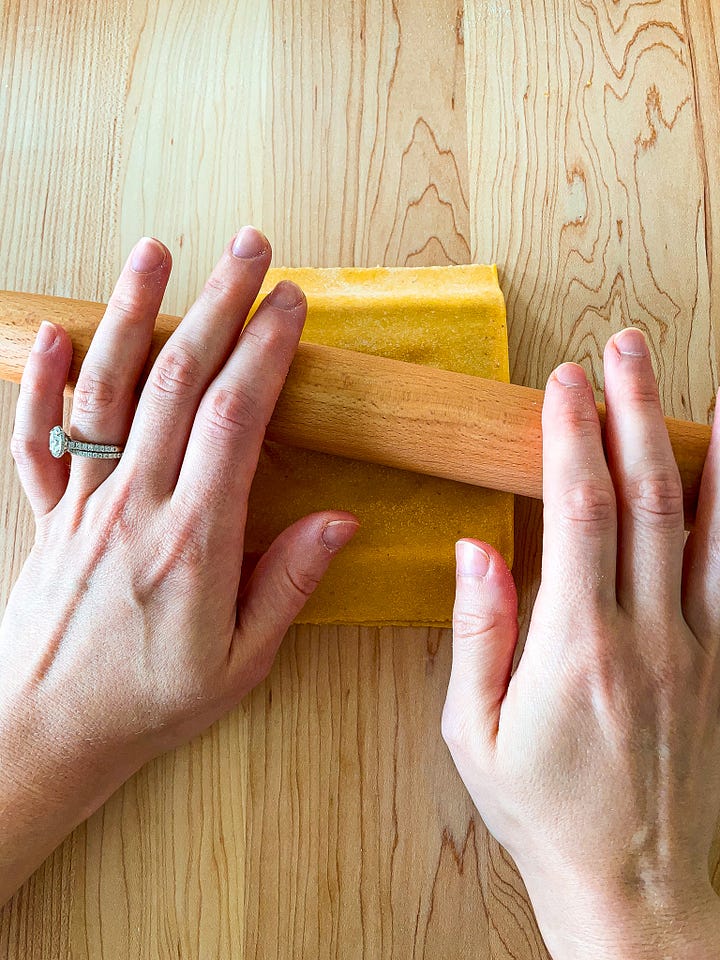
Lay another pasta rectangle on top of the filling. Use your hands to firmly press down—you’ll feel the filling dropping further into the mold. Then use a rolling pin with gentle pressure to seal the sheets together and further imprint the design, going back a forth a few times. (This can be a little tricky, so here’s what works best for me: first press straight down with the rolling pin at various points across the pasta and then roll back and forth—this prevents the dough from bunching and warping.)
Carefully flip the mold over and release the raviolo. Use a knife or pasta wheel to trim away the excess dough.
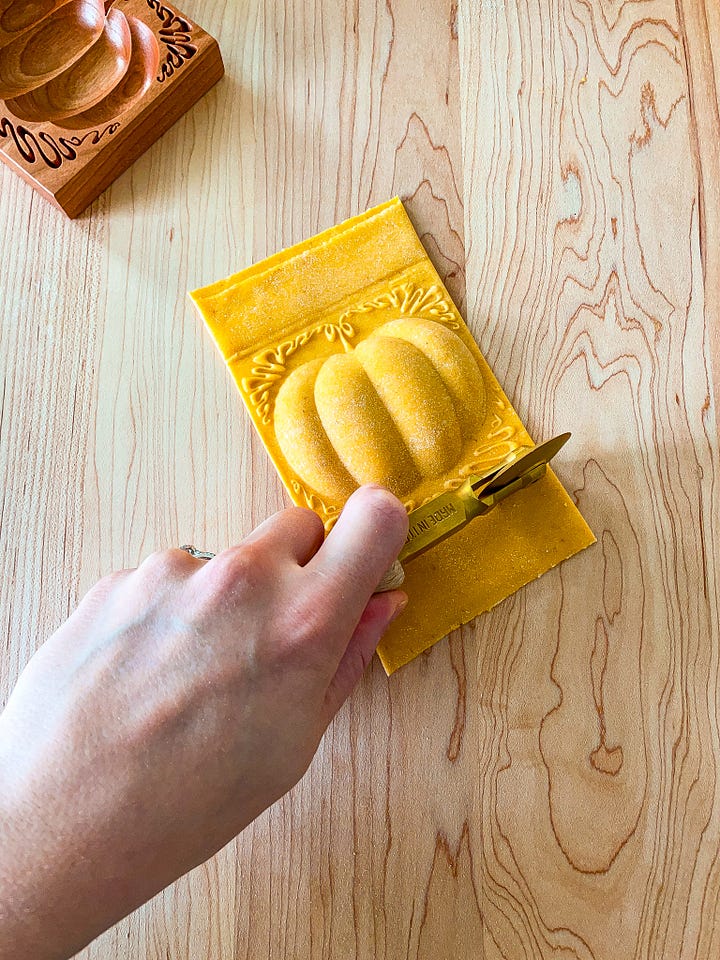
Repeat the process with the remaining pasta rectangles, and then with the remaining dough and filling. Arrange the ravioli in a single layer on the prepared sheet pan.
For serving
Bring a large pot of water to a gentle boil, then season it generously with salt.
Gently drop the ravioli into the pot of boiling water, shaking off any excess flour before you do so, and stir briefly to prevent sticking. Cook, stirring occasionally, until the pasta is tender, 2½ to 3 minutes.
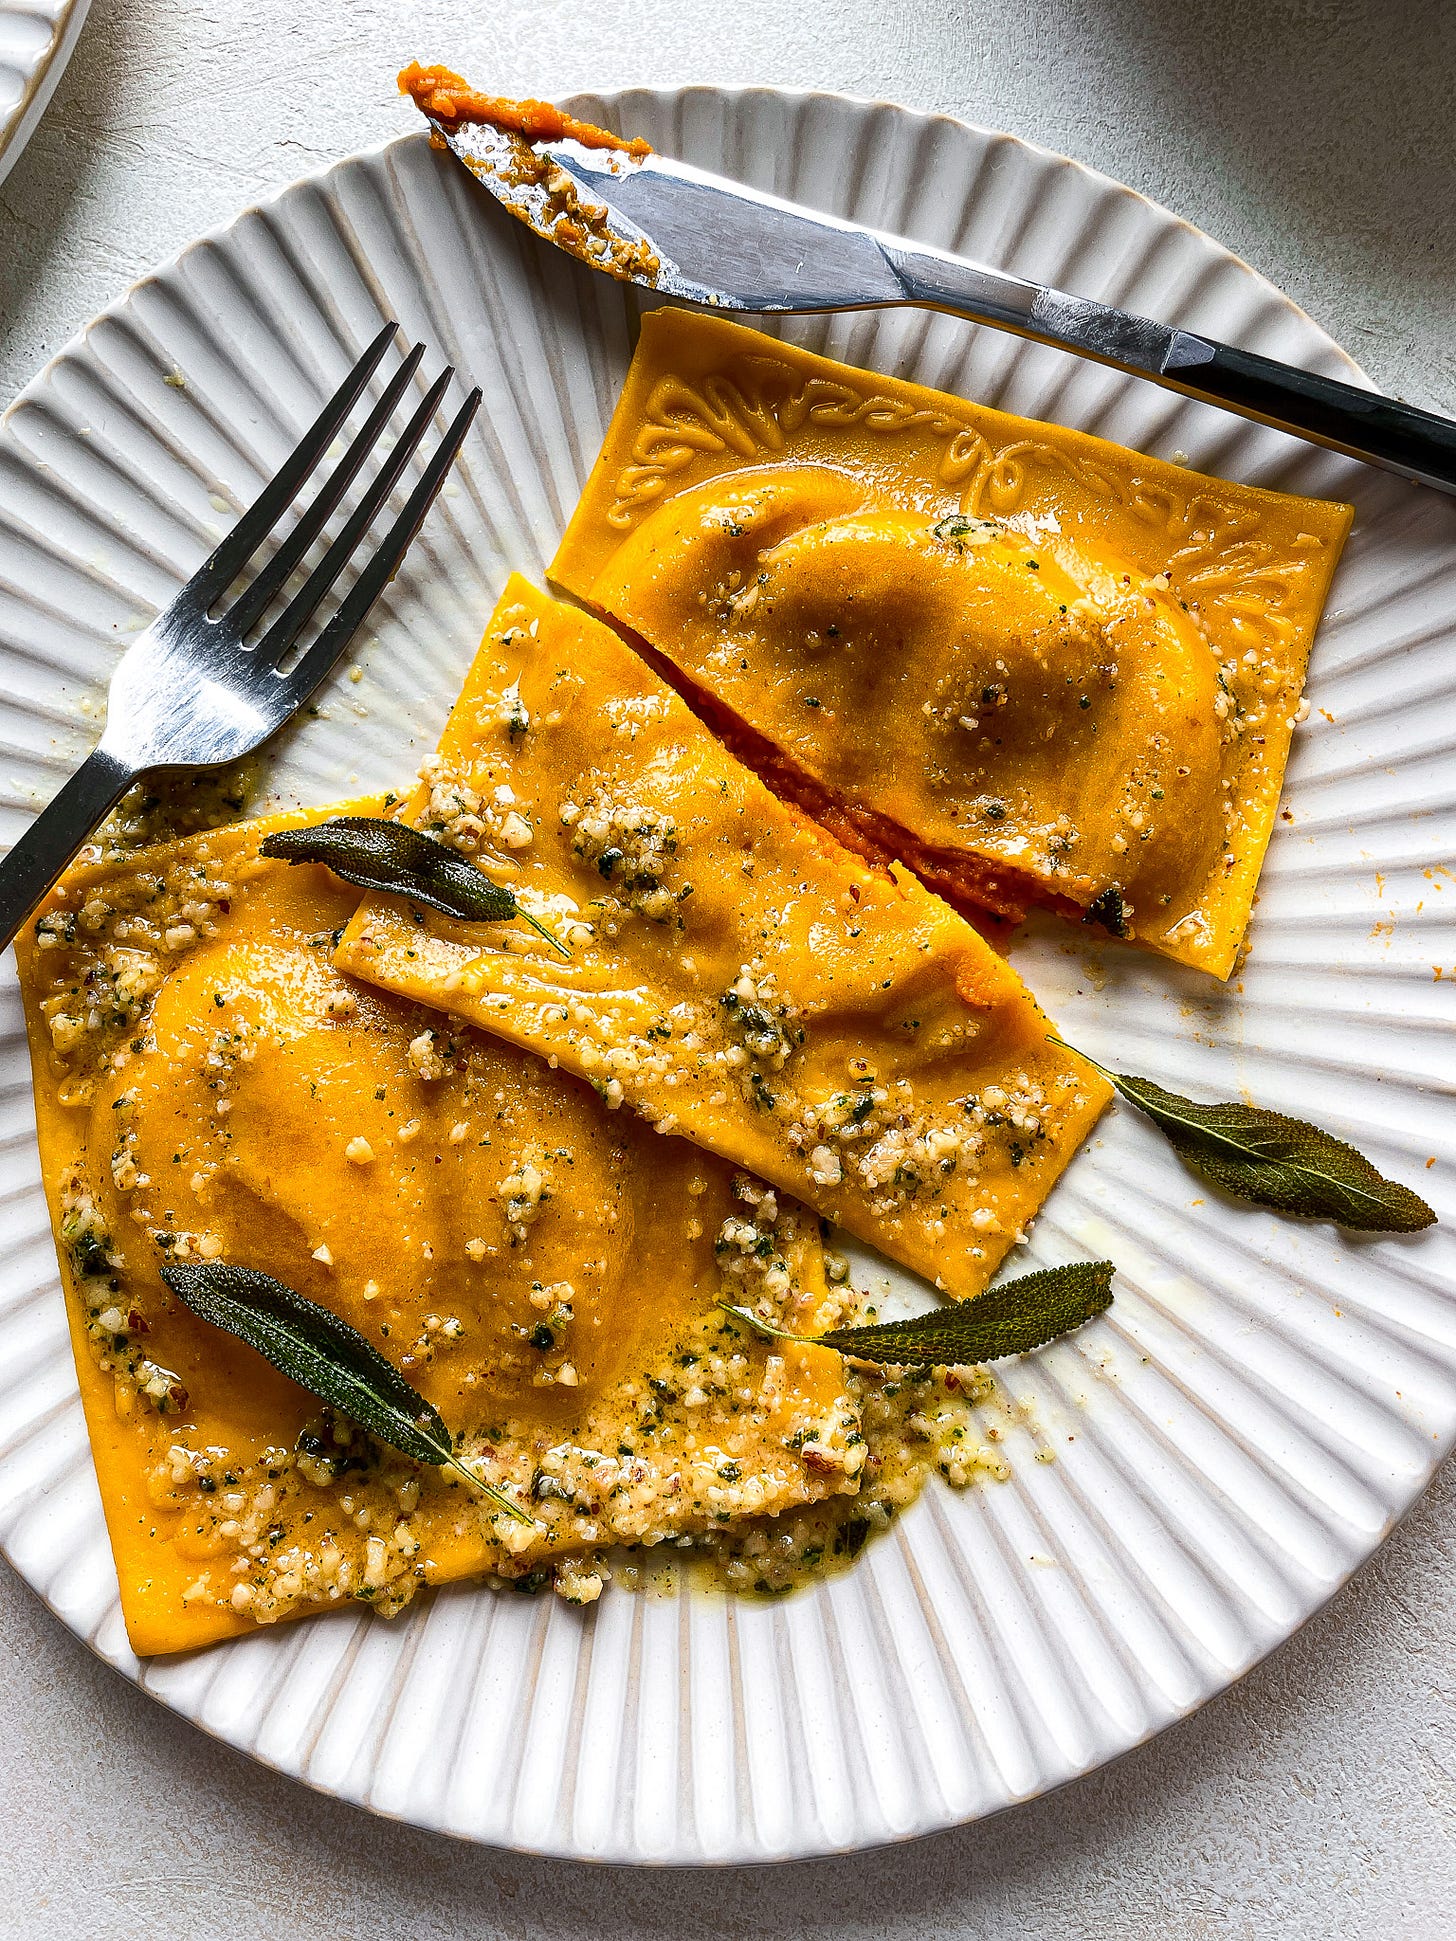
While the pasta cooks, add the pesto to a small saucepan or saucier over low heat. Ladle some of the pasta cooking water into the pan, a little at a time, and mix thoroughly until it reaches a saucy consistency. Spoon some of the pesto onto the bottom of a platter or individual plates.
When the ravioli are ready, use a spider sieve or slotted spoon to fish them out of the water and transfer them to a sheet pan or plate. Working quickly, arrange the ravioli on top of the pesto, then spoon more of the pesto on top of the pasta. Finish the dish with fried sage leaves, Parmigiano-Reggiano, and a drizzle of good olive oil. Enjoy immediately.





These are so stunning, a beautiful escape from the world today into a realm of possibility.
Every year, I ask Santa for molds from John Francis Designs. I think this is the year he finally delivers. (I took matters into my own hands and preordered your book 😉). Thank you for a beautiful recipe in an ugly time. 🧡