This post is presented in collaboration with Leah Mennies, the writer behind
, a fantastic newsletter all about dumplings and the people who make them. Stick around for a new recipe and ravioletti tutorial, and head over to Leah’s latest post for an interview with John about his creative process and how he got started.The holiday season is here, and if I close my eyes, I can just about smell the familiar aromas of slow-roasted turkey, garlicky mashed potatoes, and spiced pumpkin pie.
Increasingly, though, I’ve thought less about the food and sparkling décor, and more about the people who make this time of year feel so joyful and bright. I’m making extra time for family and friends, of course, but I’m also taking stock of the wonderful community I’ve met here, through this platform.
John Welch, the Massachusetts-based woodcarver and artist behind John Francis Designs, is part of that community. We connected a couple of years ago, at the height of the pandemic, right around the time he started tinkering with pasta tools—particularly ravioli molds—in his workshop. I’ll admit that before I met John, not only did I never use ravioli molds, but I decidedly dismissed them. You don’t need a mold to make ravioli, and I’m always one to preach against specialty tools in the hopes it’ll encourage one more person to make pasta. But John’s molds aren’t just tools, they’re masterpieces: beautifully designed, expertly carved and, best of all, fun and easy to use. They make the entire experience of making pasta—from shape to plate—a work of art.
Where John and I align most, though, is that these works of art (handmade pasta, handmade tools) shouldn’t be reserved for special occasions and holiday gatherings. They should be shared often, even every day. As John says in his interview with Leah over on Above the Fold:
“People tend to be too precious with the luxuries of life—the fine silverware comes out once a year at the holidays. I always wanted to make nice heirloom-quality things that you would want to use all the time. Even if you're just making a weeknight dinner for your family, why can’t you use a nice hand-carved spoon?”
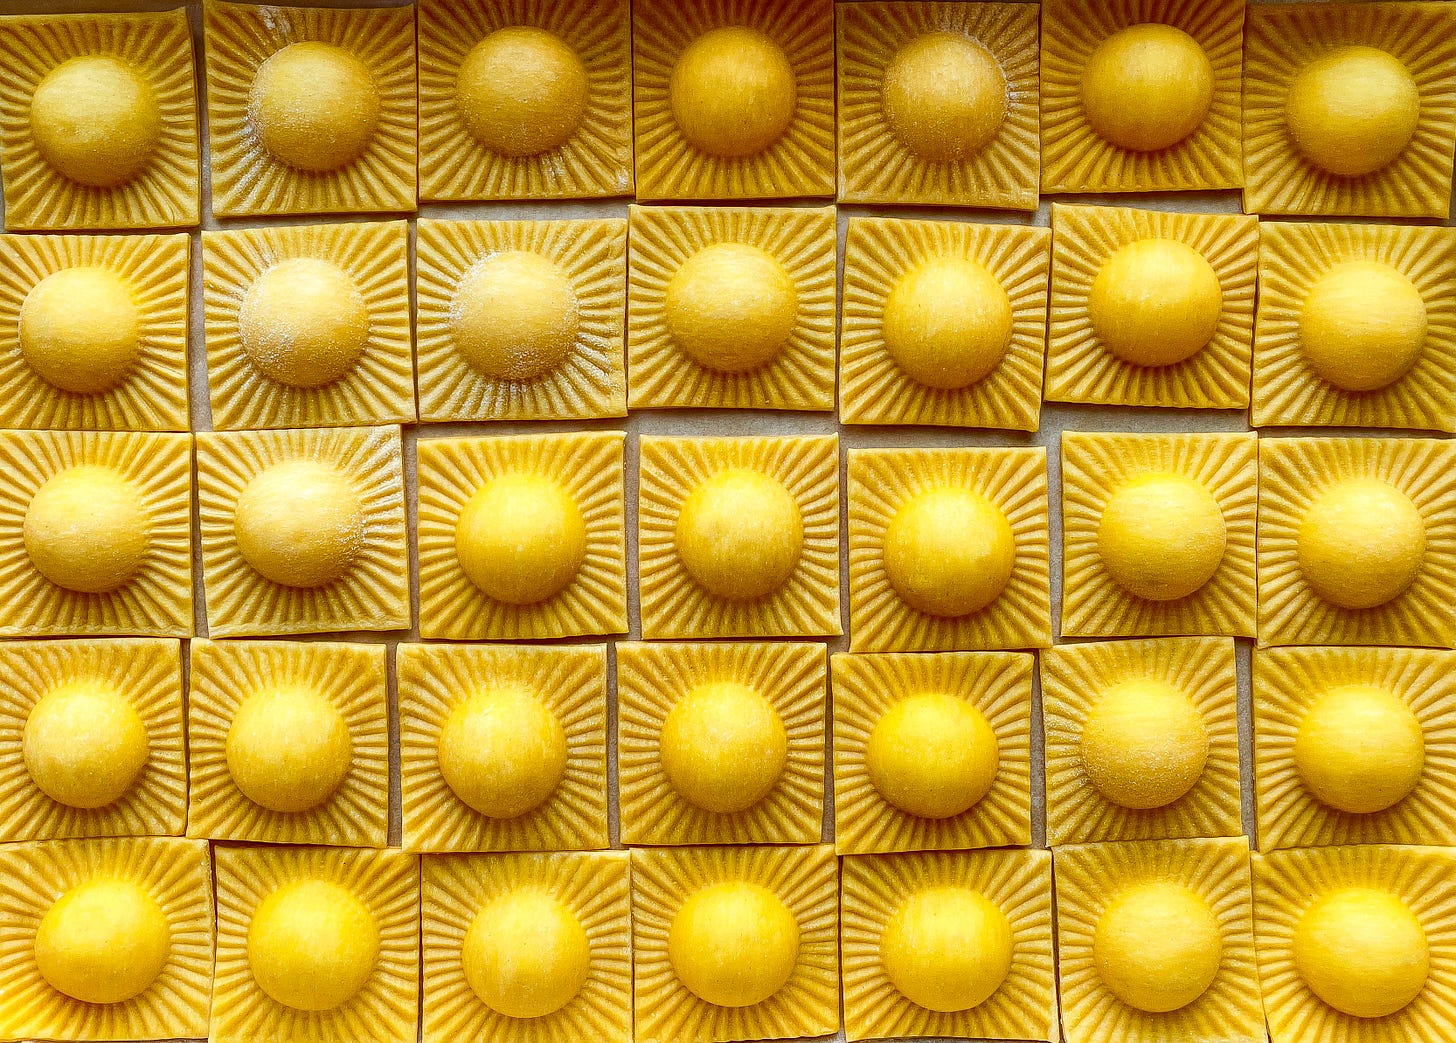
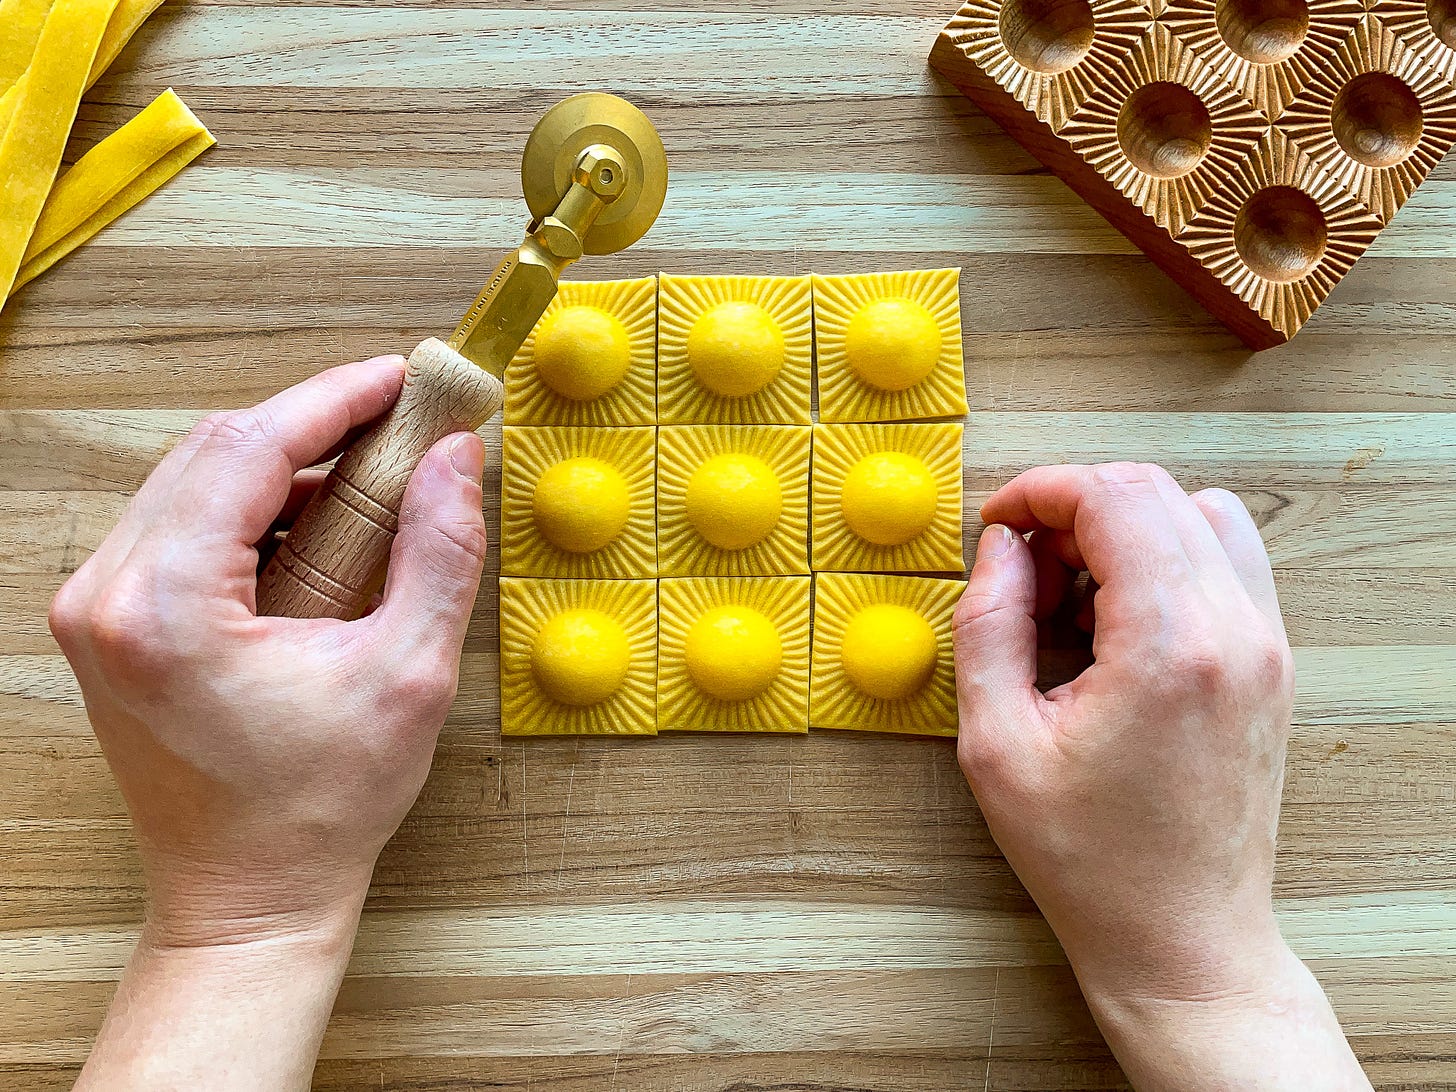
Now I have several of John’s Art Deco-inspired designs in my collection. My go-tos include his moon molds, which yield big, plump ravioli with crescent-shaped bellies. Then there are his molds geared toward specific pasta shapes, like double-stuffed ravioli (ravioli doppi) and egg yolk-filled ravioli (uovo in raviolo), both of which are at the top of my festive pasta list. But John’s latest mold, for bite-sized pieces he’s calling “ravioletti,” is my favorite. The goal, John told me, was to create a template perfect for soup season. Since the stuffed pastas traditionally served in soups and broths (in brodo) are small enough to fit comfortably on a spoon—think tortellini and cappelletti—the 1” x 1” size of these ravioli felt natural.
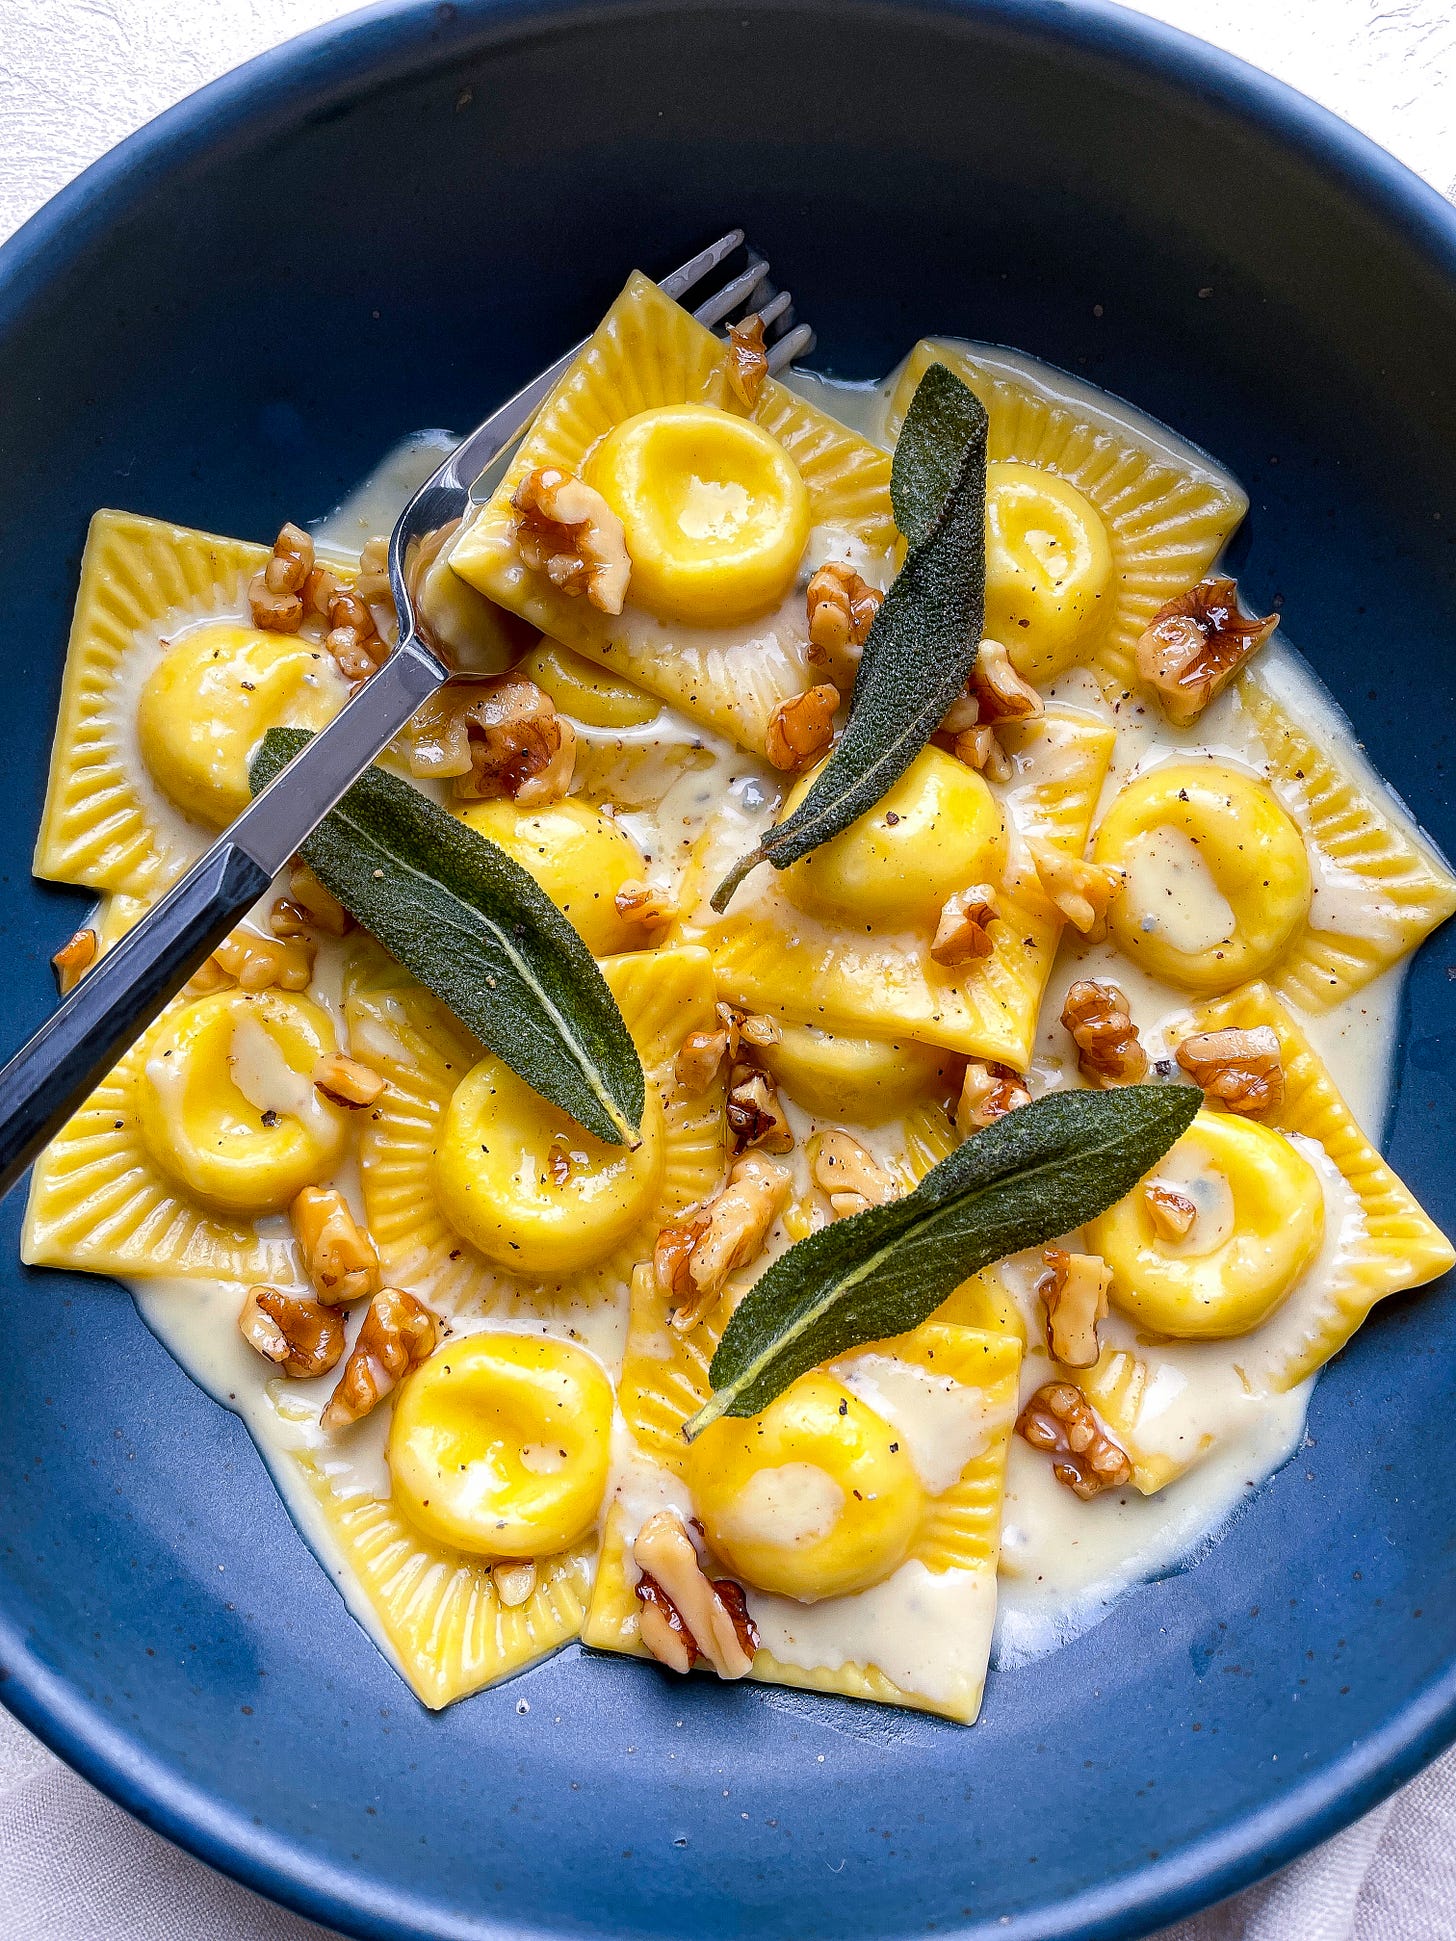
I certainly intend to make ravioletti in brodo come December, but today I’m heading to Tuscany for flavor inspiration. I don’t remember the first time I spotted Florentine pear-filled pasta, but I do know it’s been lodged in the back of my mind ever since. The love of this dish is almost a secret, and it runs deep. If you have plans to visit Florence, consider the restaurants Coquinarius, La Giostra, or, most famous of all, 4 Leoni, where you’ll find pasta parcels—often in the shape of little pouches called sacchetti or fiocchetti—packed with just-ripe pears and Tuscan cheeses, then glazed with a rich cheese or butter sauce (at 4 Leoni, the sauce is studded with asparagus for a vegetal bite). Since pears are at their peak, I felt it was time to give this one a try. And what better way to explore big, new flavors than with a small, new pasta?
Pear & Pecorino Ravioletti
Serves 4 to 6
For the pasta
1 batch egg pasta dough
Note: For a deeper golden color and more tender dough like the one pictured here, use 150 grams (about 3 large) eggs and 80 grams (about 4 large) egg yolks.
For the filling
200 grams (about 1 large) semi-ripe Bartlett, Bosc, or other pear, peeled, cored, and cut into a small dice
120 grams (4 ounces) full-fat ricotta
140 grams (5 ounces) rind-free Pecorino Toscano or another young, semi-firm sheep’s milk cheese like Petit Basque
15 to 30 grams (1 to 2 tablespoons) mascarpone
Kosher salt and freshly ground black pepper
A splash of heavy cream, if needed
For the cheese sauce
180 ml (¾ cup) heavy cream
85 to 115 grams (3 to 4 ounces) rind-free Fontina or Taleggio, cut into small cubes, or mild blue cheese like Gorgonzola Dolce or Bayley Hazen Blue, broken into small pieces, or a mix
30 grams (2 tablespoons) unsalted butter
Kosher salt and freshly ground black pepper
To finish
50 grams (½ cup) walnuts, coarsely chopped
Kosher salt
55 grams (4 tablespoons) unsalted butter, divided
15 ml (1 tablespoon) extra-virgin olive oil
16 fresh sage leaves
Equipment
Work surface, preferably wooden
Manual pasta machine or electric pasta roller attachment
Sharp knife or pasta wheel
Sunburst Ravioletti mold (or any of John’s beautiful ravioli molds!)
Pastry brush (optional)
Rolling pin
For the dough
Make the dough by hand or in a food processor according to the directions in this post. Let it rest, tightly covered, at room temperature for at least 30 minutes and up to 2 hours.
For the filling
Add the cheeses and a generous pinch each of salt and pepper to a food processor. Pulse until smooth and creamy, scraping down the sides of the bowl as needed, 30 seconds to 1 minute. If the mixture is very thick/stiff, add a splash of heavy cream to loosen it. Adjust seasoning to taste.
Transfer the cheese mixture to a bowl and fold in the pear. Season to taste. Keep the filling in the bowl or, for easier assembly, put it in a piping bag. Refrigerate until ready to use.
For the pasta
Set up your workspace: Once your dough has rested, set up your pasta machine and gather your tools. Dust a sheet pan or tray with semolina flour, or line it with parchment paper or a clean, dry dishcloth.
Roll the pasta sheets:
Cut off a quarter of the dough and cover the rest. On your work surface, flatten the section of dough with your palm into an oval-shaped pancake that’s about ¼-inch thick. Press the dough between your fingers to thin it out as needed.
Set your pasta machine to its widest setting. Position one tapered end of the oval in the center and roll it through once—you should be left with a longer, thinner oval.
Position the dough lengthwise on your work surface. Then fold the two tapered ends into the center like an envelope so the length is the same or similar to the slot of the pasta roller (about 6 inches; it doesn’t matter if the tapered ends overlap or if there’s space between them). Flatten the dough again with your palm/fingers so it’ll go through the machine easily.
Line up the bottom edge of the pasta envelope with the edge of the machine (the folded ends should run horizontally). Roll the dough through the machine on the same (widest setting) a second time—you should be left with a rectangular-ish piece of dough (it’s okay if the ends aren’t perfect!).
Continue rolling the dough through the machine one time on each progressive setting until you have a thin (but sturdy) sheet. On both my Marcato Atlas 150 and Kitchen Aid machines, I roll the dough to setting 6, and then roll it through setting 6 a second time. If the dough feels sticky or tacky as you roll, dust both sides with some 00 or all-purpose flour.
Cut the pasta sheet into squares: Trim any uneven edges from the pasta sheet (you can ball up the scraps, cover them, and reuse them after the fresh dough is gone). Cut the sheet into squares that are slightly larger than the size of the mold (in this case, about 6 inches). Ideally, you’ll end up with an even number of squares since you’ll need 2 for each set of ravioletti.
Assemble the ravioletti:
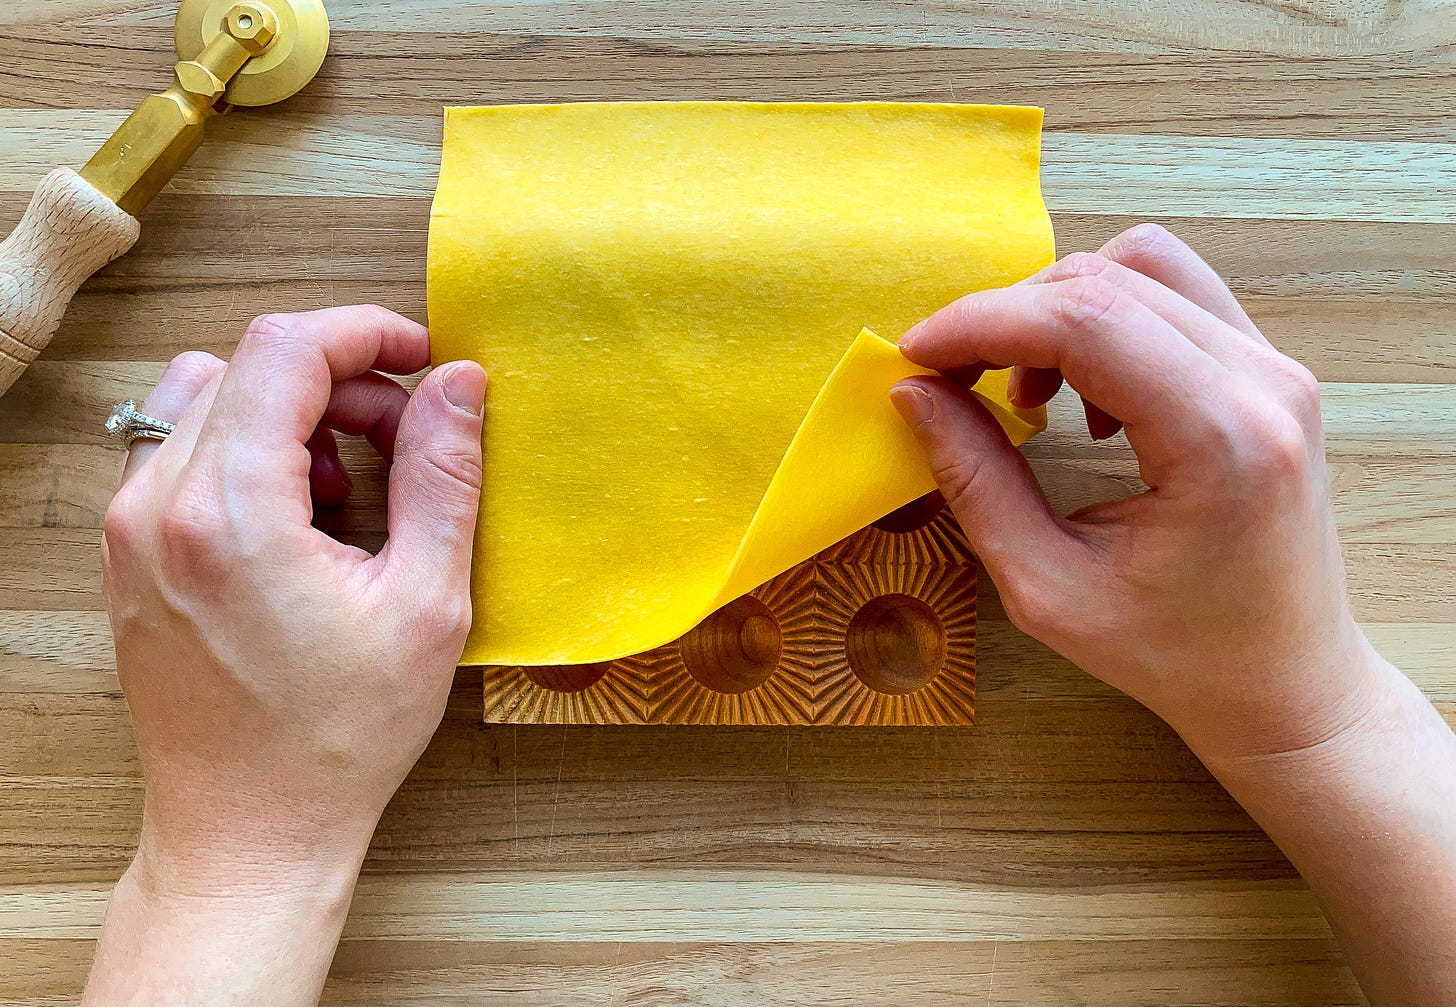
Lightly dust one side of one of the squares with flour and cover the remaining squares with a damp dishcloth so they don’t dry out. Position the square floured-side down on top of the ravioletti mold.
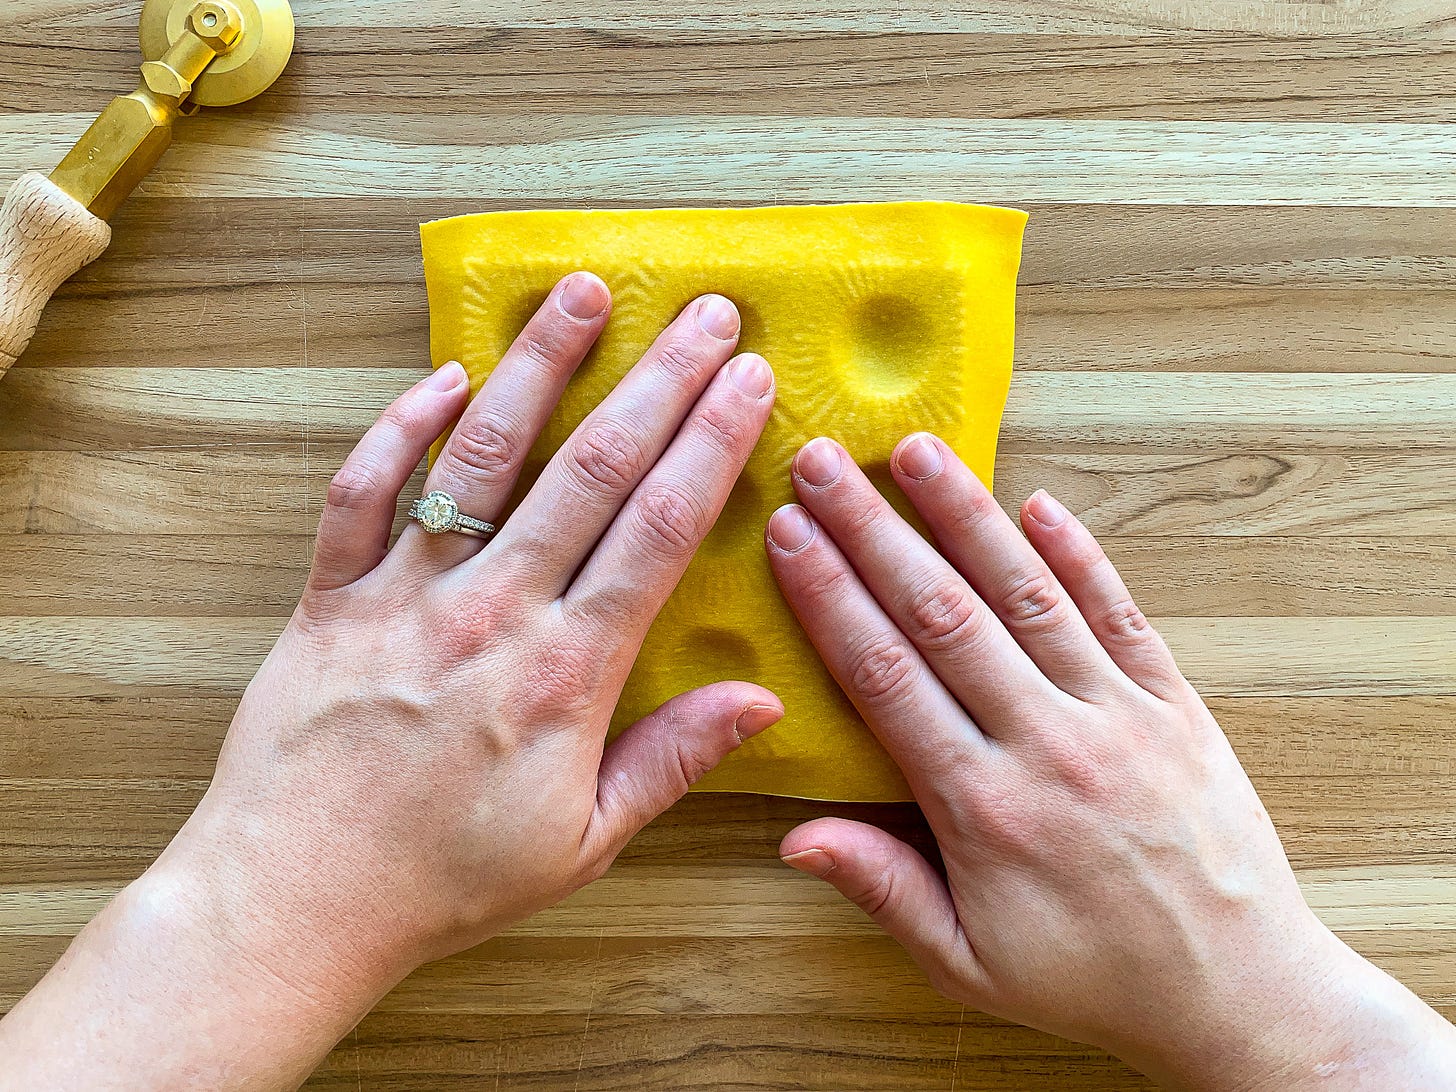
Using your fingers, a large clean paint brush, or a pastry brush, gently press the pasta into the mold, making sure to press into each filling pocket and paying particular attention to the carved details. It’s okay if the pasta doesn’t reach the bottom of each filling nook—the filling itself will do that for you later.
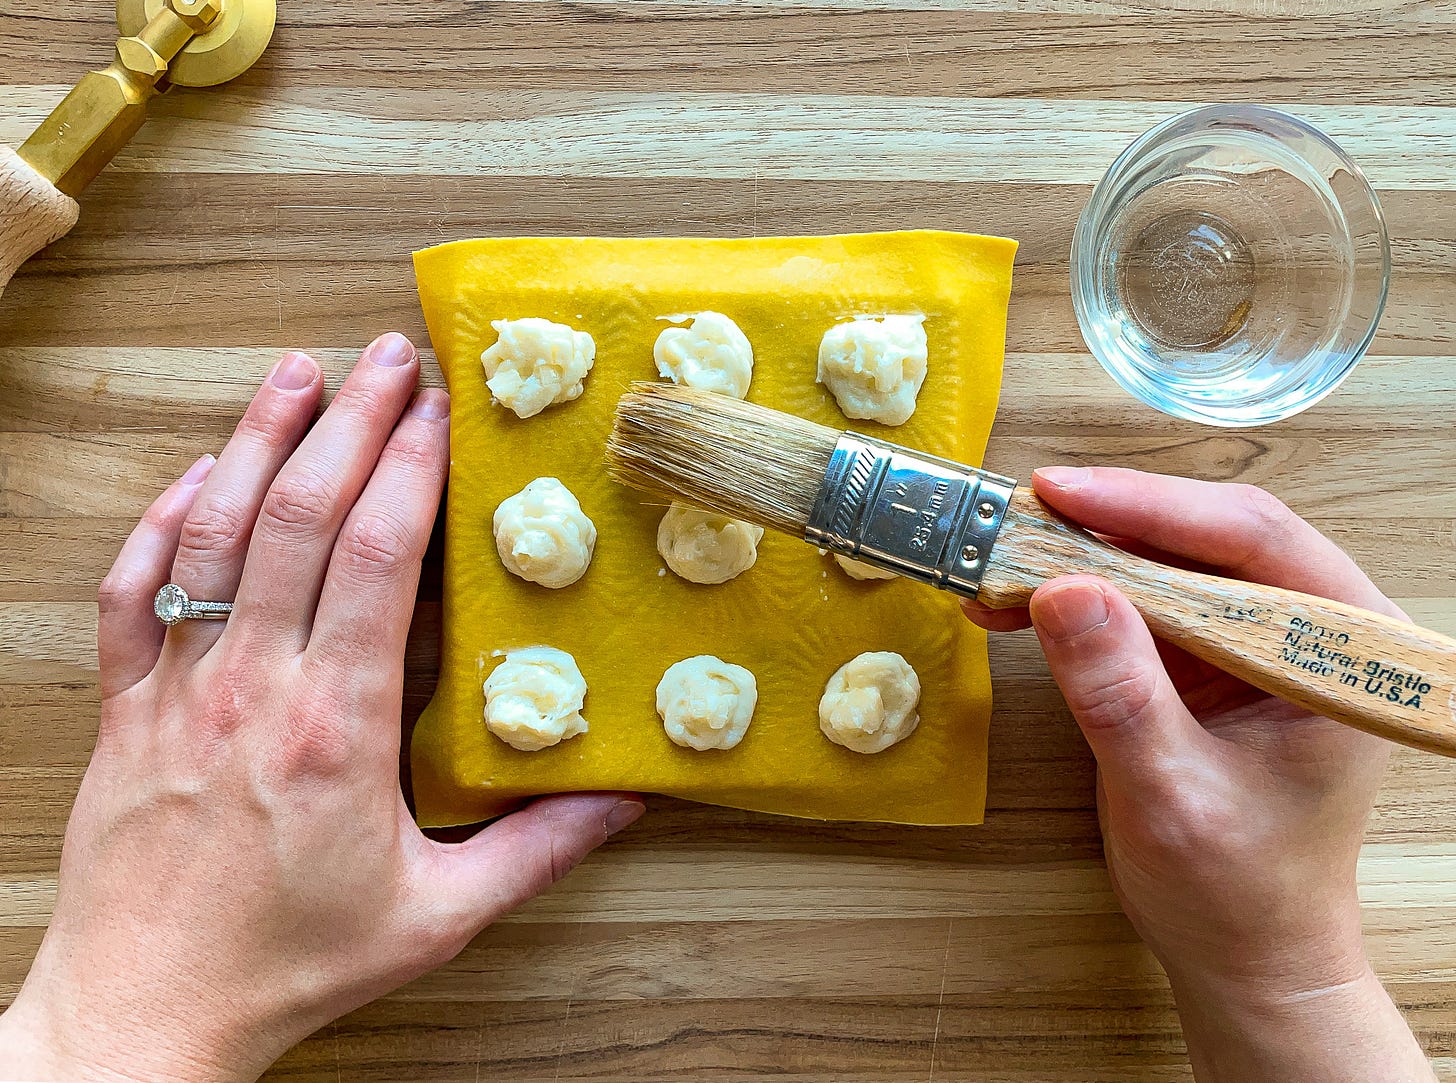
Pipe or spoon some filling into each pocket—don’t worry if it pops up above the mold a little. Use your finger or a pastry brush to brush some water between the filling pockets and on the edges.
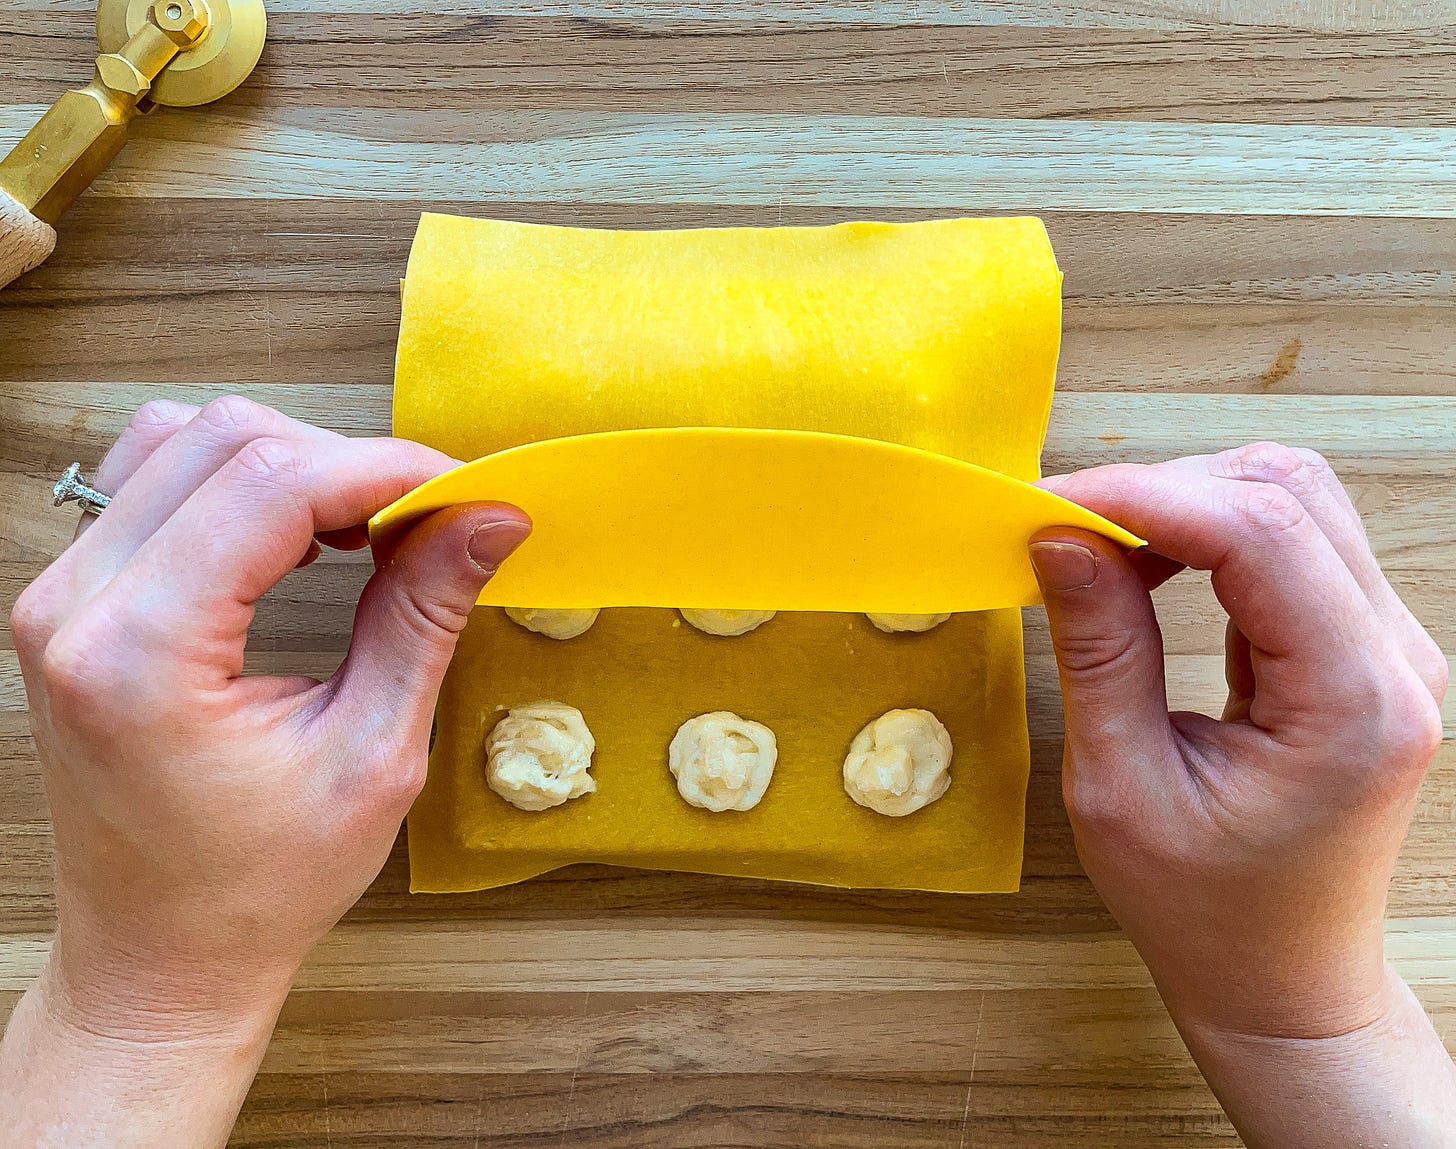
Lay another pasta square on top of the filling (if the dough feels a little tacky, dust some flour on one side and position that side facing up).
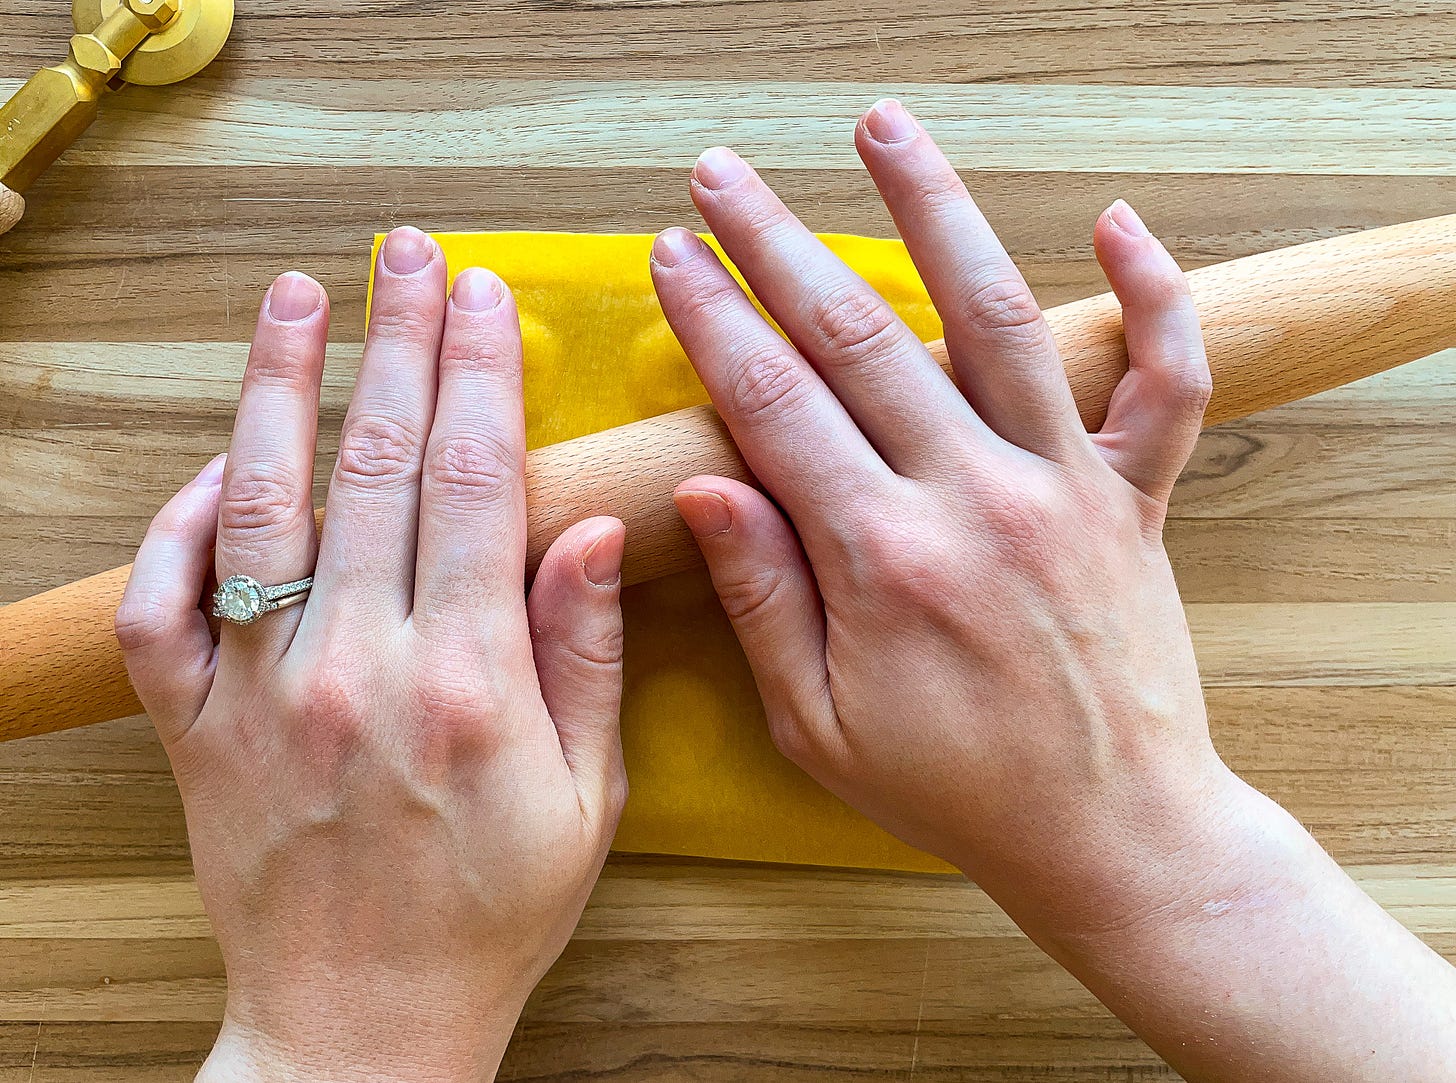
Use your hands to firmly press down—you’ll feel the filling dropping further into each pocket. Then use a rolling pin with gentle pressure to seal the sheets together and further imprint the design, going back a forth a few times.
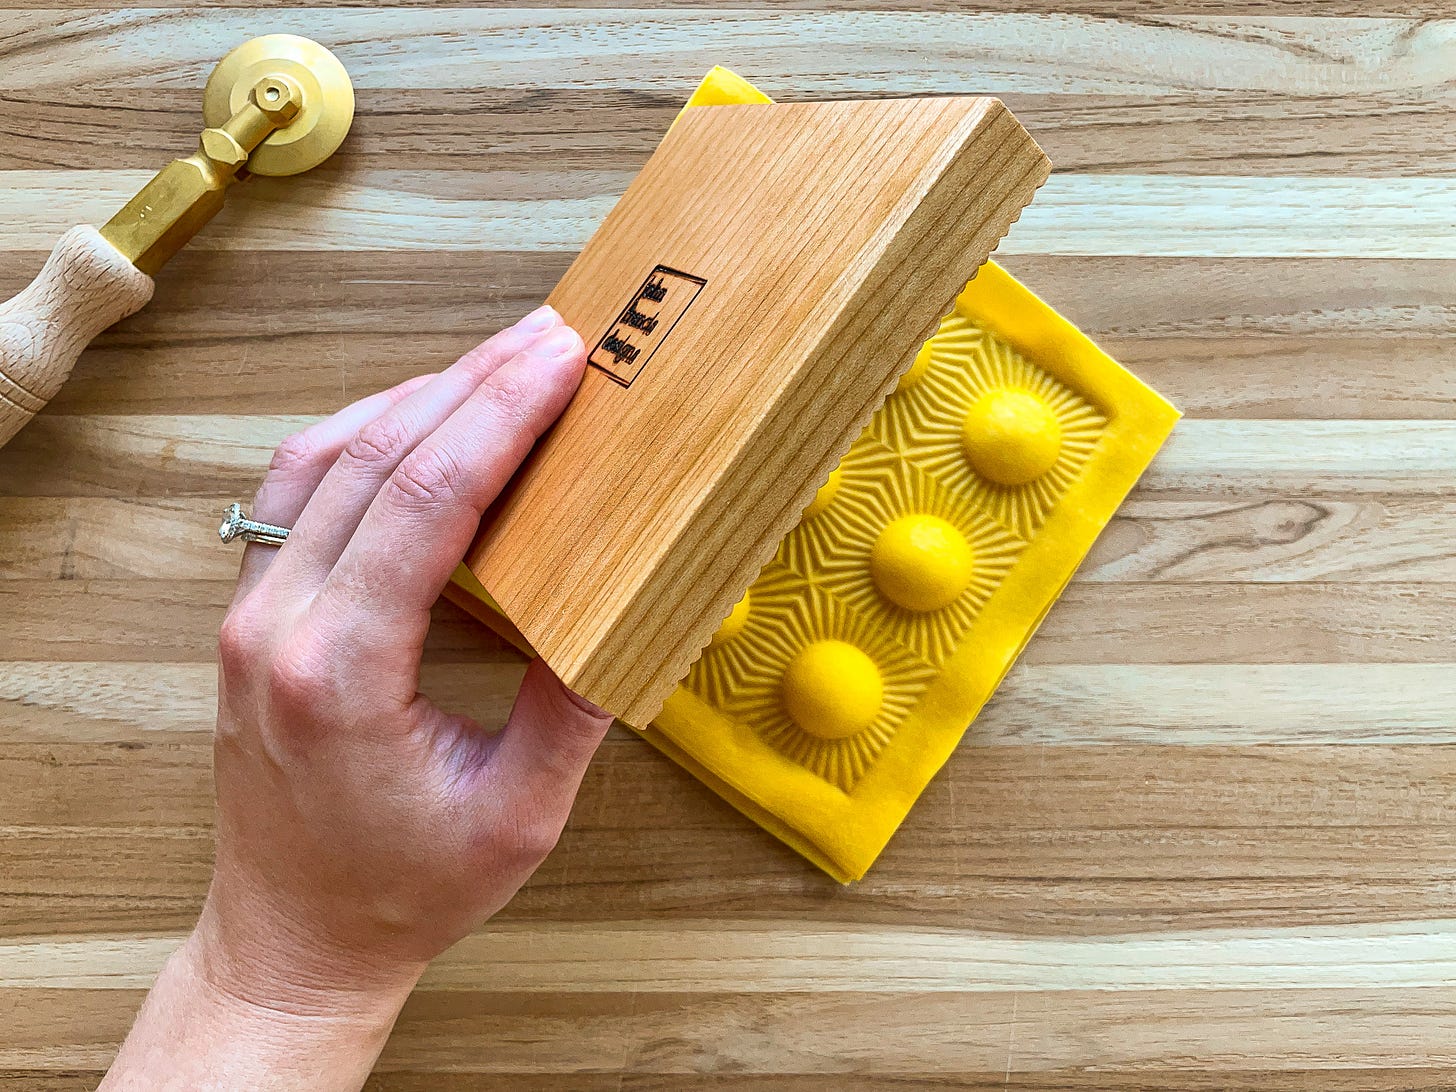
Carefully flip the mold over to release the ravioletti. Use a knife or pasta wheel to trim the excess dough away, then cut between the rows to create the individual pieces.
Arrange the ravioletti in a single layer on the prepared sheet pan. Repeat the process with the remaining pasta squares, and then with the remaining dough and filling.
For the sauce
Toast the walnuts: In a medium skillet, cook the walnuts over medium heat, stirring occasionally, until fragrant and toasted around the edges, about 5 minutes. Season with salt, then transfer to a plate.
Fry the sage: In the same pan, warm 2 tablespoons of the butter and the oil over medium heat. Add the sage and cook, swirling the pan often, until the sage darkens and the butter begins to brown, 2 to 3 minutes. Turn off the heat. Transfer the sage to a paper towel-lined plate, then return the toasted nuts to the pan with the butter/oil and stir until coated. Set aside.
Finish the dish:
Start bringing a large pot of water to a gentle boil.
Add the cream to a small, heavy-bottomed saucepan. Bring to a simmer and cook, stirring occasionally, until slightly thickened and reduced by ¼, about 5 minutes.
Turn the heat to low and add the cheese(s) in small increments, whisking after each addition, until melted and smooth. Whisk in the butter. Season to taste with salt and pepper; keep warm over low heat and whisk occasionally.
When the water is boiling, season it generously with salt. Add the ravioletti and cook until tender, stirring occasionally, 2½ to 3 minutes.
Reserve ½ cup (120 ml) pasta cooking water, then transfer the pasta directly to a large mixing bowl with the remaining 2 tablespoons of butter (you can drain the pasta in a colander first if preferred). Swirl the pasta and butter together vigorously in the bowl until it’s well-coated.
Working quickly, spoon some of the sauce onto the bottom of a large platter or individual bowls (if it’s very thick, whisk in a splash of pasta cooking water to loosen). Arrange the ravioletti on top, then drizzle with more sauce. Top with the buttered walnuts, fried sage, and a few cracks of black pepper. Serve and enjoy!
Storage
This recipe is a bit of a project, so you can stagger it over a couple of days. The filling can be stored in a sealed piping bag or airtight container for up to 3 days. The pasta can be frozen, as follows: Pop the tray with the ravioletti in the freezer, uncovered, until just solid, about 25 minutes. Then transfer them to a freezer-safe bag or container and return to the freezer for up to 3 months (they’ll taste better the sooner you cook them, of course). Cook straight from frozen—just add about a minute to the cooking time.




I got to spend awhile with John in his studio last month for an Edible Boston story (https://www.edibleboston.com/blog/2022/11/7/edible-makers-john-francis-designs) and fell in love with his tools too. I haven't used my ravioletti mold yet, but will now with this guide!