One day, when I live in the sticks of Montana or, preferably, the Italian riviera, surrounded by my own vegetable and herb gardens, I might enjoy making pesto. But today, holed up in my small downtown D.C. apartment, with barely a windowsill to support my botanist fantasies, is not that day. Unpopular opinion it might be, but I’m pretty sure I’m not alone when I say—at least for us American city-dwellers—that making pesto from scratch is a bit of a pain in the a**. (To be clear, when I say “pesto,” I’m talking about the famous green-eyed beauty, pesto alla Genovese, the one with all the basil. There are lots of other, less basil-forward pestos that I enjoy making by hand without a second thought.)
The problem, I’ve found, with making basil pesto is twofold: 1) the best pesto requires the best basil, and a lot of it, and 2) the best pesto is made by hand, in a mortar and pestle. Sourcing copious amounts of beautifully sweet and fragrant basil here is difficult and expensive, and whipping out the mortar and pestle takes time (and exceptionally strong arms). So I am not ashamed to admit that when I am craving a classic basil pesto, I’ll happily buy it and, in those instances, I always reach for the one from Gotham Greens.
Never would I call myself an “influencer” (do we still use that word? Is it now “creator”?), but sometimes my work involves doing things that an influencer does. One of those things is, occasionally, working with brands to develop recipes, make videos, and/or shoot photos spotlighting their products. I am very particular about the brands I work with and always have been; it’s rare for me to create “sponsored content.” But there are many brands and products that I do absolutely love, support, and enjoy sharing with you. And one of those brands is Gotham Greens, whose basil pesto inspired today’s recipe.
This is not the first time I’ve worked with Gotham Greens. When I first started Pasta Social Club, back in 2019, I collaborated with their New York team on a workshop at their Brooklyn headquarters. Even now, five years later, I look back on that event as one of my favorites. Yes, we made pretty herb-laminated pasta like the ravioli I’m sharing today, but we also took a tour of one of the company’s urban greenhouses. Because not only does the premium quality of Gotham Greens products set it apart, but also its sustainable methods: Gotham Greens grows its herbs and lettuces hydroponically—indoors, in facilities that are solar- and wind-powered, and climate-controlled—in cities across the United States. Yesterday, the Gotham Greens team and I reunited and hosted another workshop together here in D.C. (we made more herb-laminated pasta and basil-infused cavatelli—it was a joy!). I honestly cannot recommend their products enough.
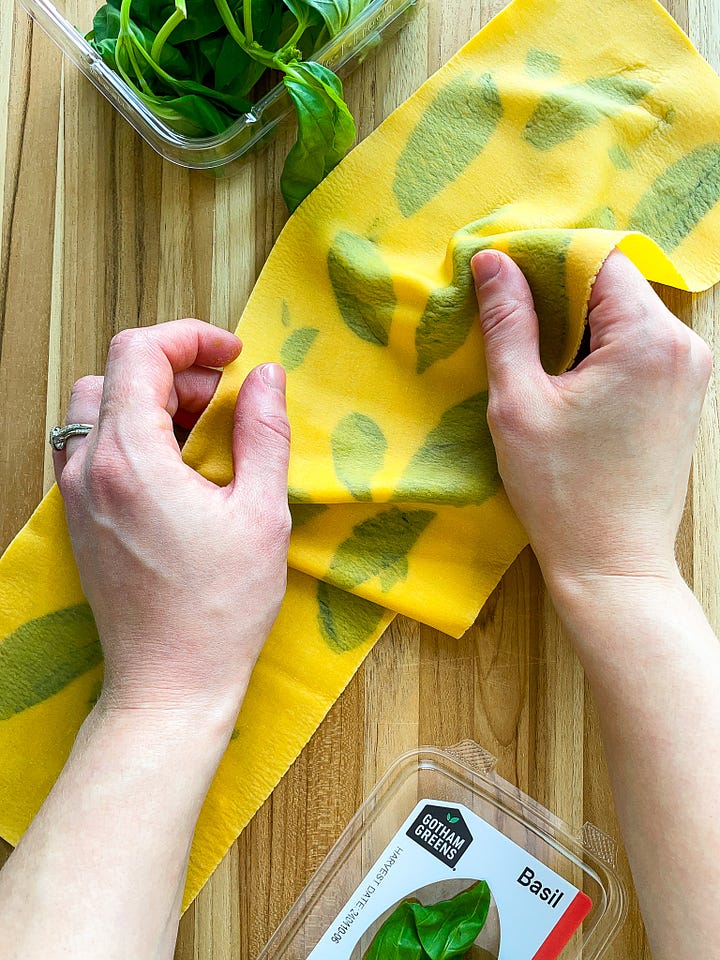
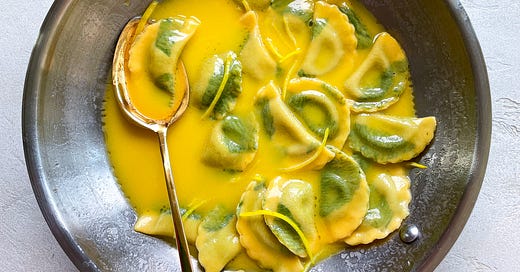
Okay, okay, let’s move on to the recipe. Today I’m using basil pesto in a way that’s a little unexpected: Instead of on the outside of these ravioli, as a sauce, it’s on the inside, as part of the filling. In fact, this is perhaps the easiest filling I’ve ever made (just two ingredients!), but that doesn’t mean it’s any less delicious. To take this dish to the next level, I embedded the pasta sheets for the ravioli with fresh basil leaves—the aforementioned herb-laminated pasta, a relatively modern technique—to give it a stained glasslike effect. This is, of course, totally optional (you can use this filling with any stuffed pasta you like; on the flip side, you can make herb-laminated pasta sheets into any other sheeted shape—pappardelle is a favorite), but I will say it’s one of those things that looks far more complicated than it is, and I can promise it will impress anyone at your table. Indeed, might I suggest this as an ultimate I love you this Mother’s Day weekend?
A few notes on herb-lamination:
I opted for basil here, but any tender herbs like sage, parsley, mint, stripped thyme, and dill are all great options; skip firm needles like rosemary and avoid any stems, which can puncture the pasta during lamination. Edible flower petals, if you can find them, make a stunning addition, too.
Know that whatever you choose, the flavor will be subtle, so you can still use dill even if you’re not a big fan (the fronds are especially beautiful in this technique).
Stick with small and medium-sized leaves to prevent tears as the dough stretches—large leaves also contain more moisture, which can burst and make the pasta sticky.
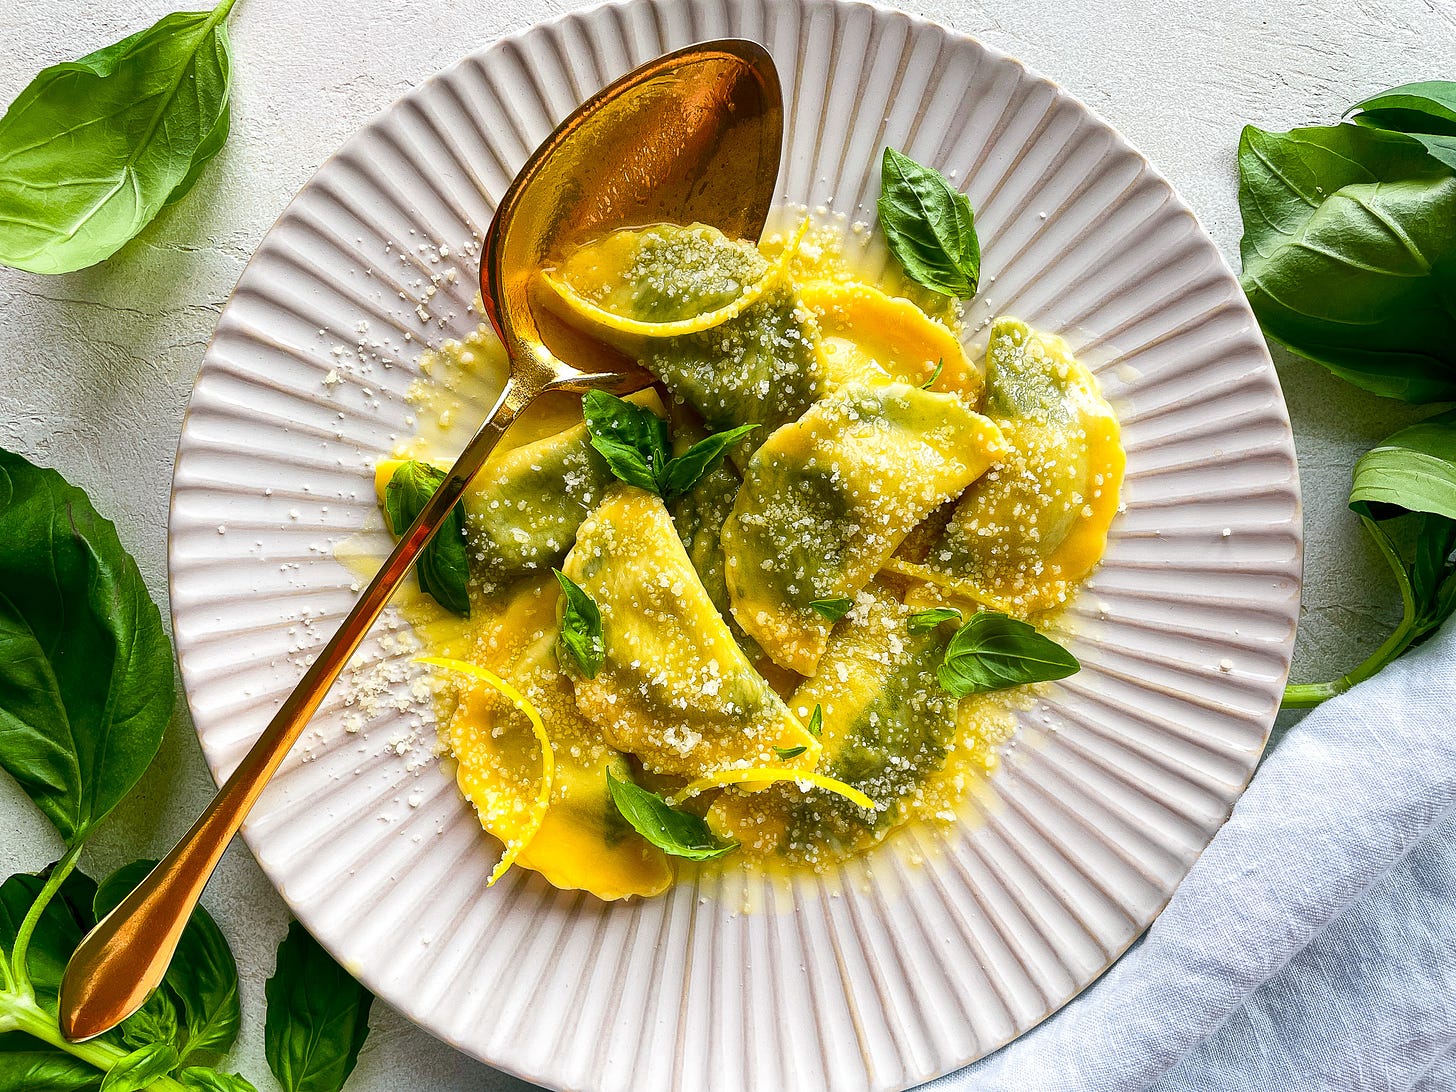
Basil & Burrata Ravioli
Serves 4 to 6
For the filling
8 ounces cold burrata, blotted dry and torn into large pieces*
1 (6½-ounce) package Gotham Greens classic basil pesto, cold**
Kosher salt
For the pasta
1 batch egg pasta dough
1 bunch fresh basil, other tender herbs, and/or edible flowers, small and medium leaves only (see notes above)
For serving
1 lemon, scrubbed
115 grams (½ cup; 1 stick) cold unsalted butter, cut into tablespoons, plus more as desired
Kosher salt
Finely grated Parmigiano-Reggiano, for serving
Fresh basil leaves, for serving
*If you’d like, swap the burrata for fresh mozzarella and splash of cream to loosen, if needed, or best-quality full-fat ricotta.
**If you can’t find Gotham Greens pesto, use homemade or your favorite store-bought variety.
For the filling
Blot the burrata dry with paper towels; drain off any excess oil from the pesto. Add the burrata and pesto to a food processor and pulse to combine, scraping down the sides of the bowl as needed, until smooth and creamy. Season to taste with salt. Transfer to a bowl or piping bag and refrigerate until ready to use, preferably overnight.
Note: This recipe makes more filling than you’ll need; any leftovers are delicious spread on toast or as dip!
For the pasta
Make the dough:
Make the dough by hand or in a food processor according to the directions in this post. Let it rest, tightly covered, at room temperature for at least 30 minutes and up to 2 hours.
Set up your workspace:
Set up your pasta machine. Line a sheet pan or tray with parchment paper, or dust it with a thin layer of coarse semolina.
Roll the pasta sheets:
Cut off a quarter of the dough and re-wrap the rest. On your work surface, flatten the section of dough with your palm into an oval-shaped pancake that’s about ¼-inch thick. Press the dough between your fingers to thin it out as needed.
Set your pasta machine to its widest setting. Position one tapered end of the oval in the center and roll it through once—you should be left with a longer, thinner oval.
Position the dough lengthwise on your work surface. Then fold the two tapered ends into the center like an envelope so the length is the same or similar to the slot of the pasta roller (about 6 inches; it doesn’t matter if the tapered ends overlap or if there’s space between them). Flatten the dough again with your palm/fingers so it’ll go through the machine easily.
Line up the bottom edge of the pasta envelope with the edge of the machine (the folded ends should run horizontally). Roll the dough through the machine on the same (widest) setting a second time—you should be left with a rectangular-ish piece of dough (it’s okay if the ends aren’t perfect!).
Continue rolling the dough through the machine one time on each progressive setting until you have a semi-thin sheet (on a Marcato Atlas 150 and KitchenAid machine, roll to setting 6). If the dough feels sticky or tacky as you roll, dust both sides with some ‘00’ or all-purpose flour.
Cut the pasta sheets:
Lay the pasta horizontally on your work surface; if using a countertop, dust it with a little ‘00’ or all-purpose flour first. Trim away any uneven ends (ball them up and re-wrap them or save them for soup). Fold the sheet in half crosswise, like a book, make a crease at the midpoint, then unfold it again. Cut the pasta in half along the crease so you have two even pieces.


Add the herbs (see video below!):
If the dough feels dry, cover one of the pasta sheets with a damp dishcloth and set aside. Scatter the herb leaves across the other sheet in whatever pattern you like and press them firmly into the dough to adhere (use a little water to help them stick if needed).
If the dough feels dry, spritz or brush the areas without herbs with a little water. Lay the unused half of the pasta on top, sandwiching the herbs between them. Smooth out the air pockets and press down firmly to seal.
Laminate the pasta:
Trim a thin strip of dough, about ¼ inch, from the longer sides of the pasta so the sheet is slightly narrower than the width of your pasta machine. Dust both sides of the dough very lightly with ‘00’ or all-purpose flour.
Set your pasta machine back two settings wider than it was before (for the Marcato/Kitchen Aid, that’s setting 4). Slowly roll the sheet through once, then set the machine to the next thinnest setting (5) and roll it through again, followed by once more on your original setting (6). At this point, the pasta sheet can be made into any shape you like—I’m prone to pappardelle!
Cut the pasta into rounds:
Use a 2½-inch cookie cutter to cut out as many rounds from the laminated pasta sheet as you can.
Fill and assemble the ravioli:
Spoon or pipe dollops of filling, 1 to 2 teaspoons each, in the center of a few rounds, leaving a generous border of dough around them (cover the rest of the rounds with a damp dishcloth so the dough stays hydrated). If the dough feels dry, add a small amount of water with your finger along half of the filled round.
Fold each round into a half-moon, gently pressing out the air around the filling as you do so. Once the filling is encased, press the edges firmly between your fingers once more to seal and thin out the dough.
Arrange the finished pieces in a single layer on the prepared sheet pan. Repeat with the remaining dough and filling.
For serving
Bring a large pot of water to a gentle boil, then season it generously with salt.
Use a Y or other vegetable peeler to peel a few long strips of zest from the lemon, avoiding as much of the bitter white pith as you can. Slice each strip lengthwise into thin strands.
With a ladle or heatproof measuring cup, add ½ cup (120 ml) of the pasta cooking water to a large sauté pan or saucier and bring to a lively simmer over medium-high heat. Let it bubble for a few moments.
Reduce the heat to low. Add the cold butter, 1 tablespoon at a time, and whisk or stir constantly until the butter melts and the sauce thickens (if the glaze gets too thick, whisk in another splash of pasta water; if it’s too thin or you want more sauce, add more pieces of cold butter). About halfway through, stir in the lemon zest, then season to taste with salt and a squeeze of lemon juice if you’d like. Turn off the heat and stir occasionally.
Gently drop the ravioli into the boiling water, in batches if necessary, shaking off any excess flour before doing so. Stir for a few moments to prevent sticking and cook the pasta until tender or to your liking, about 2½ to 3 minutes.
Using a spider sieve or slotted spoon, either:
Transfer the pasta to the pan of butter (if it’s big enough to hold it all) and gently toss the two together for a few moments over medium heat, then arrange on a platter or divide among plates;
or, if the pan isn’t big enough to hold the pasta, arrange the cooked ravioli on a (preferably warm) platter or individual plates and spoon the butter sauce on top.
Finish the dish with grated Parmigiano-Reggiano and basil. Serve immediately.


As a person from Montana. You have about a 2 month growing period to grow basil. You’d use all your hard work for this recipe alone! Italy it is haha! Love this recipe perfect way to ring in spring! Thank you my friend!
Thank you Meryl. I always learn so much from you. And, if I see Gotham Greens, I will definitely coordinate.