almost (but definitely not) carbonara—plus, pasta social club events are back!
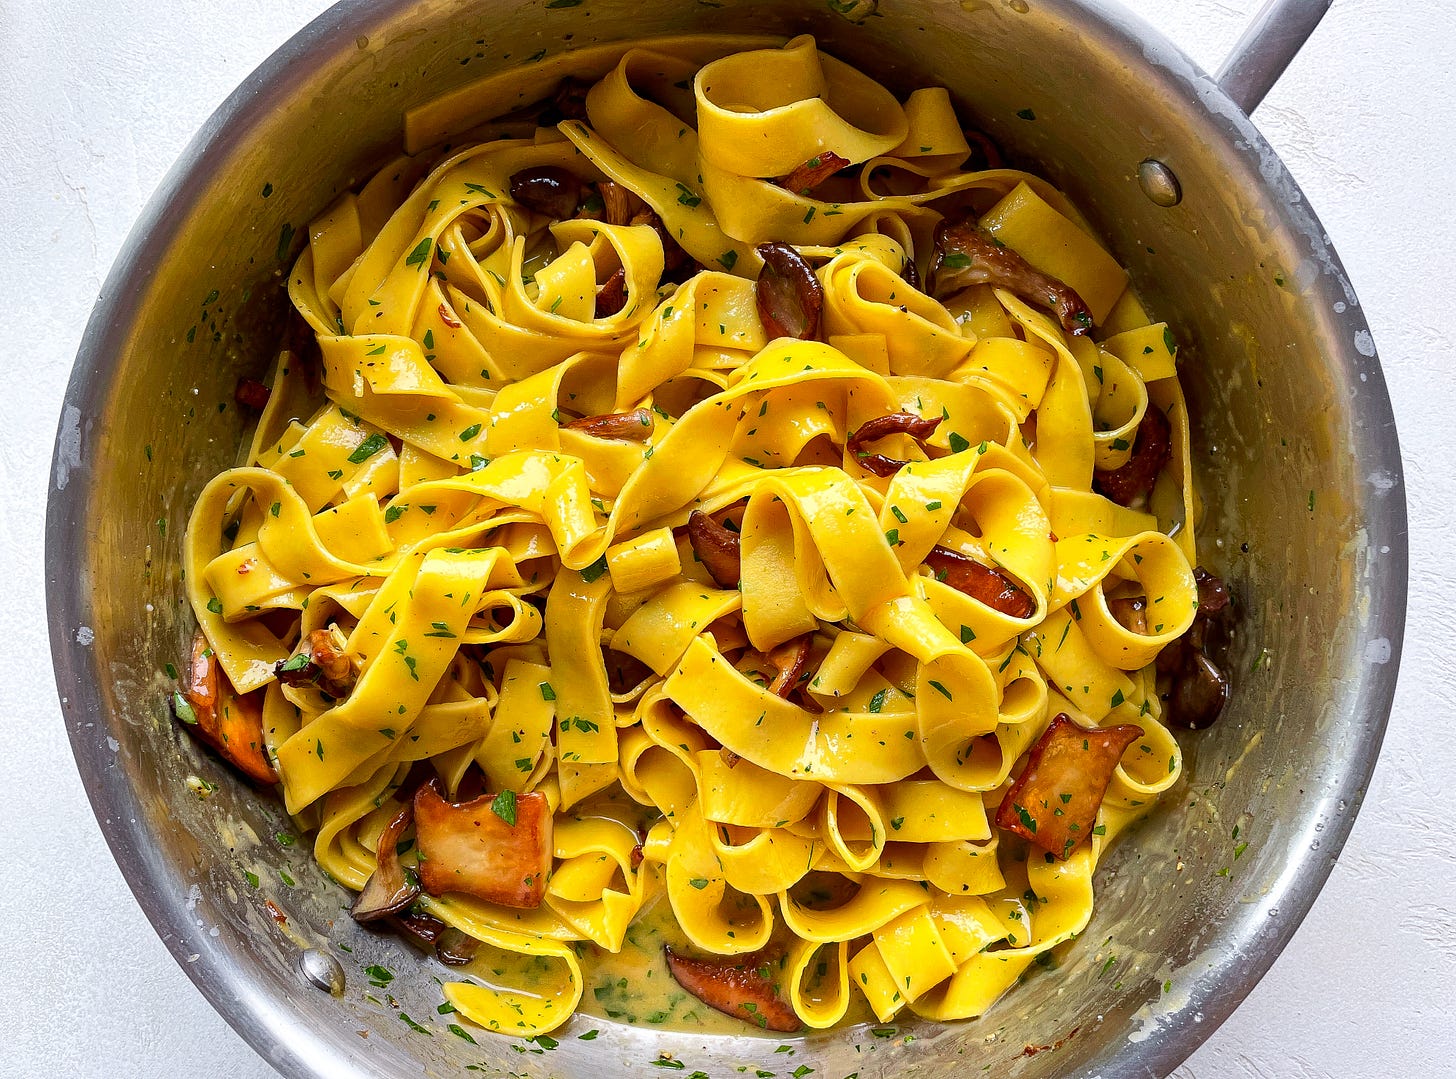
fettuccine with mushrooms, eggs & cheese
First things first: Pasta Social Club events are back!
I’m so excited to return to in-person events with my first pasta-making workshop in Washington, D.C. on Thursday, November 10 at 6:00pm! We’ll enjoy a cozy autumnal menu and make two of my favorite types of pasta: ravioli (squash filling! cheese filling! butter & sage!) and cavatelli (roasted tomato & garlic sauce!). We’ll make the dough and shape the pasta together, then cook it all up and sit back to revel in the fruits of our labor. Other snacks, dessert, and wine will be included.
This workshop is hosted in partnership with FRESHFARM, a D.C.-based nonprofit that works to create a more resilient, equitable, and sustainable food future in the Mid-Atlantic region, and connect people to their food through hands-on education, farmers markets, and food distribution programs. We’ll be sourcing ingredients at their flagship Dupont Circle Market from a range of local farmers and makers.
If you’re not based in the DMV area, don’t worry! I’ll be hosting a virtual stuffed pasta workshop in partnership with Milk Street on Thursday, October 27 at 6:00pm Eastern. We’ll make the pasta dough together, then transform it into some more intricate stuffed shapes like caramelle and scarpinocc, all packed a roasted winter squash filling—a perfect project for the cooler weather!
(And use code PASTASOCIAL for 15% off!)
Ok, on to the recipe…
I’ll come right out and say it: I’ve never tasted carbonara.
In my previous newsletter, I mentioned that 1) I recently reintroduced meat into my diet after nearly a decade, and 2) I only eat kosher meat—and you can’t have a Roman carbonara without guanciale (cured pork cheek aka definitely not kosher). So! While we’re not making carbonara today, we are adapting the technique to make something similar. Instead of crispy bits of pork, this recipe is built on golden, meaty mushrooms—because it’s October, and October is mushroom time!—and a touch of Japanese miso paste alongside the traditional eggs, cheese, and pepper.
This recipe isn’t just inspired by the Roman classic, though. I’ve also been eyeing two vegetarian-friendly pasta dishes from Naples, one with eggs, cheese, and a bit of parsley (pasta cacio e uova or, in local dialect, cas’ e ova) and another with mushrooms, eggs, cheese, and cream (miezi paccheri alla capa ’e’ mbrello). Although pasta cacio e uova isn’t traditionally meatless—the pasta is often tossed with garlic-infused strutto (lard) before adding the eggs—versions that swap lard for olive oil or butter aren’t uncommon. It’s usually served with tiny pasta tubes (tubetti) and uses a mix of Pecorino Romano and Parmigiano-Reggiano, making it a little sharp, a little nutty, like this recipe here.
Let’s talk about technique—and the pasta—for a moment.
From a technical standpoint, what makes a successful carbonara (and carbonara-adjacent sauce like this one) is coaxing ingredients that like to clump or scramble into a silky, emulsified sauce. There are a number of ways to do this, but for me it means tempering the egg/cheese mixture by adding a little hot pasta cooking water, then combining it with the pasta off the heat (and mixing vigorously!). The result is unctuous and scramble-free every time.
These types of emulsified cheese sauces—including carbonara’s ever-popular sister, cacio e pepe—also benefit from the starch in the pasta’s cooking water, which acts as a binder between pasta and sauce. Most recipes recommend dried pasta over fresh because it takes longer to cook and thereby gives you the most bang for your buck: more time in the water = more time for the pasta to release starch. You’ll almost always find carbonara served with some type of spaghetti or rigatoni, but there are still plenty of variations. The most traditional way to serve cacio e pepe, on the other hand, is with tonnarelli, fresh, eggy, square-shaped spaghetti. It’s also common to pair it with other fresh pastas like pici, hand-rolled spaghetti from Tuscany, or even gnocchi.
My point is that you can use fresh or dried pasta here—if your technique is correct, the relative starchiness of the water doesn’t really matter (plus, the ‘00’ flour used to make many fresh pastas has a high starch content, so it helps compensate for the short cook time). I ultimately settled on fettuccine, long ribbons from Lazio—home to Rome and its carbonara—because it just felt right.
Fettuccine with Mushrooms, Eggs & Cheese
Serves 2, generously
1 large whole egg
3 to 4 large egg yolks (my yolks were on the small side, so I used 4)
2 ounces (55 grams) finely grated Pecorino Romano (see prep note below)
2 ounces (55 grams) finely grated Parmigiano-Reggiano (see prep note below)
8 ounces (225 grams) mixed mushrooms like oyster, maitake, chanterelle, and king trumpet
2 tablespoons (30 grams) unsalted butter
1 tablespoon (15 ml) extra-virgin olive oil
1 large garlic clove, peeled and smashed
Kosher salt
1 heaping tablespoon (20 grams) white miso paste (optional)
Freshly ground black pepper
10½ ounces (300 grams) fresh fettuccine (instructions follow) or dried pasta of choice
A large handful flat-leaf parsley (leaves and tender stems), minced
Prepare the ingredients:
Take the eggs out of the fridge and let them come to room temperature.
Grate the cheeses on the smallest, star-shaped holes of a box grater—I find this helps them melt more smoothly, but if you don’t have a box grater, use a microplane.
Tear or slice the mushrooms into bite-sized pieces (leave small ones whole). I like to keep the form of the mushroom mostly intact.
Make sure everything else is ready to go—things will move quickly.
In a wide sauté pan, warm the butter and oil over medium heat. Add the garlic and cook, turning occasionally, until fragrant and golden, about 3 minutes. Discard the garlic.
Add the mushrooms to the pan and stir until they’re coated in butter/oil. Then cook in a single layer, leaving them undisturbed, until they release most of their moisture, 5 to 7 minutes (try to keep the pieces separate so they brown better). Continue to cook, turning occasionally, until deeply golden on all sides.
Season the mushrooms with salt, then transfer them to a plate. Remove the pan from the heat but don’t wipe it out.
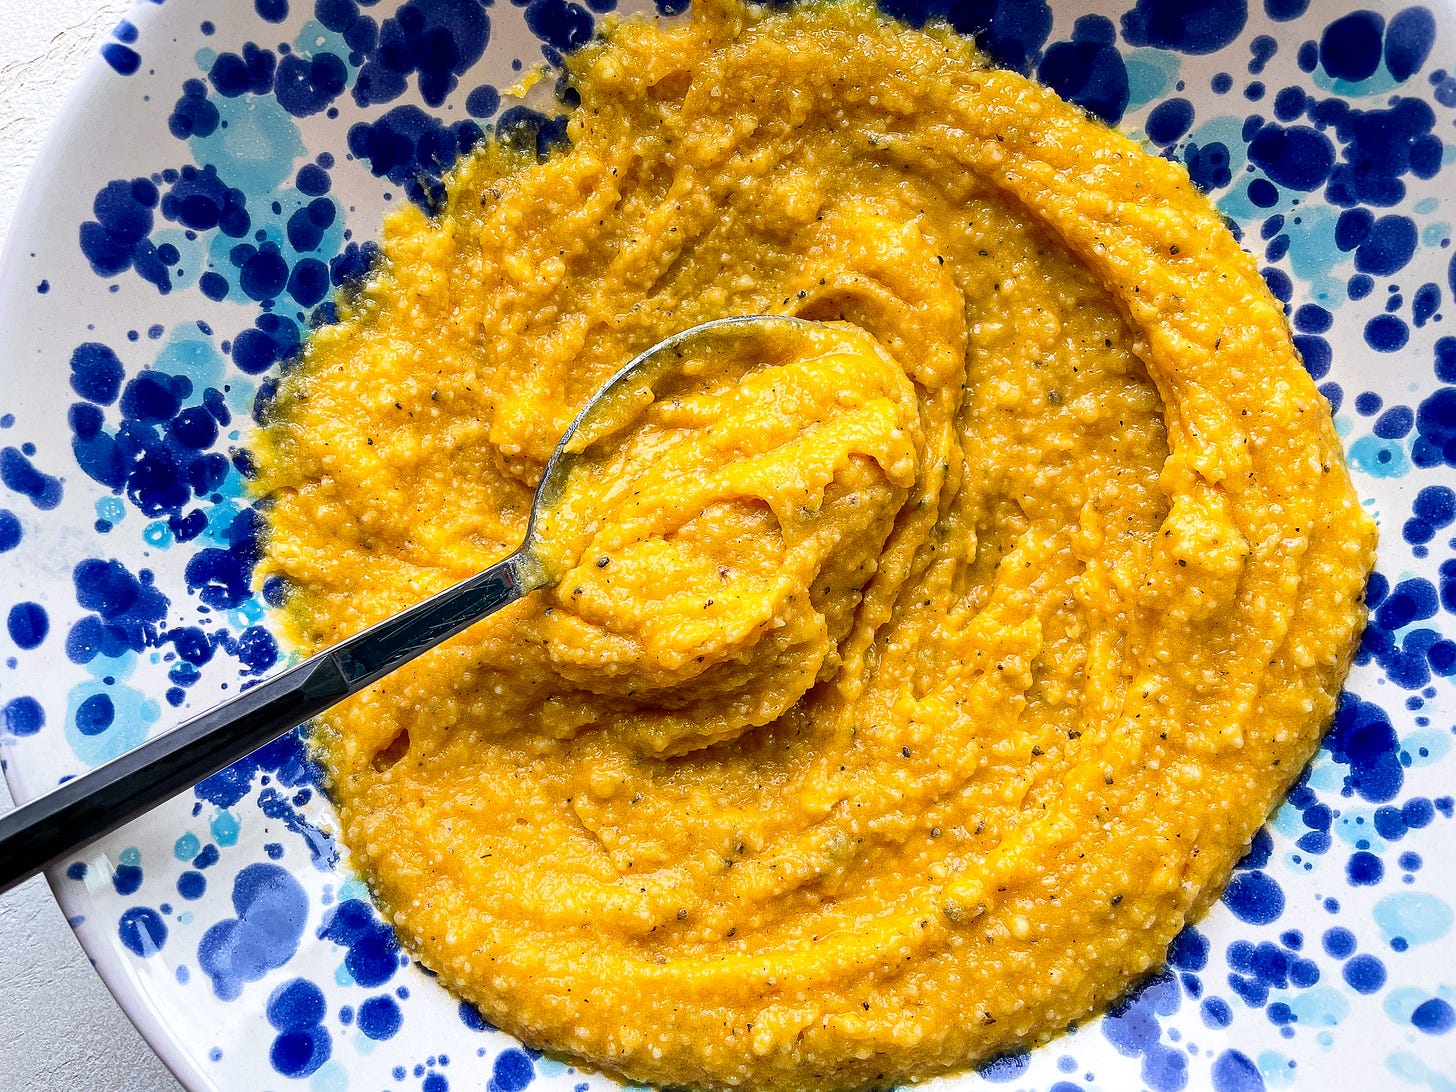
In a medium mixing bowl, whisk the egg and yolks together until smooth. Add the cheeses, miso (if using), and a generous amount of black pepper—at least 1 teaspoon—and mix again until thick and paste-like.
Bring a large pot of water to a boil, then season it generously with salt. Add the fettuccine and cook, stirring every so often to prevent sticking, until just shy of tender, about 2 minutes (or, if using dried pasta, just shy of al dente).
Return the pan that held the mushrooms to medium heat, then use tongs and/or a spider sieve to transfer the pasta directly to the pan, along with enough cooking water to coat the strands (about ¼ cup). Toss the pasta often until the water bubbles and thickens, 1 to 2 minutes.
Scoop out ¼ cup pasta cooking water and add it a splash at a time to the egg mixture, mixing quickly and thoroughly to combine, until you reach a creamy, pancake-batter-like consistency—you might not use all the water.
Remove the pan from the heat (don’t just turn off the burner; move it to a heat-proof surface or trivet). While the pasta is still hot, pour in the egg mixture and mix constantly until the pasta is well-coated and glossy (really keep that pasta moving!).
If the sauce is very loose, return the pan to very low heat (or, better yet, prop it on top of the still-steaming pot of pasta water) and continue mixing until it reaches your desired consistency—note that the sauce will continue to thicken as it cools, so if it’s slightly runny, that’s totally fine. If the sauce is dry, mix in a splash of pasta water at a time to loosen it.
Stir in the reserved mushrooms and parsley and adjust seasoning to taste. Serve immediately, finished with more black pepper if you’d like.
Let’s make fettuccine!
What you need:
1 batch egg pasta dough—you’ll only need about half of the dough for this recipe, but I prefer to make it all and freeze the leftover shaped pasta for a rainy day
Work surface, preferably wooden
Manual or electric pasta machine
Sharp knife or fettuccine pasta machine cutter attachment
‘00’ flour (or all-purpose flour) and coarse semolina flour, for dusting
A sheet pan or platter, for holding the finished pasta
What you do:
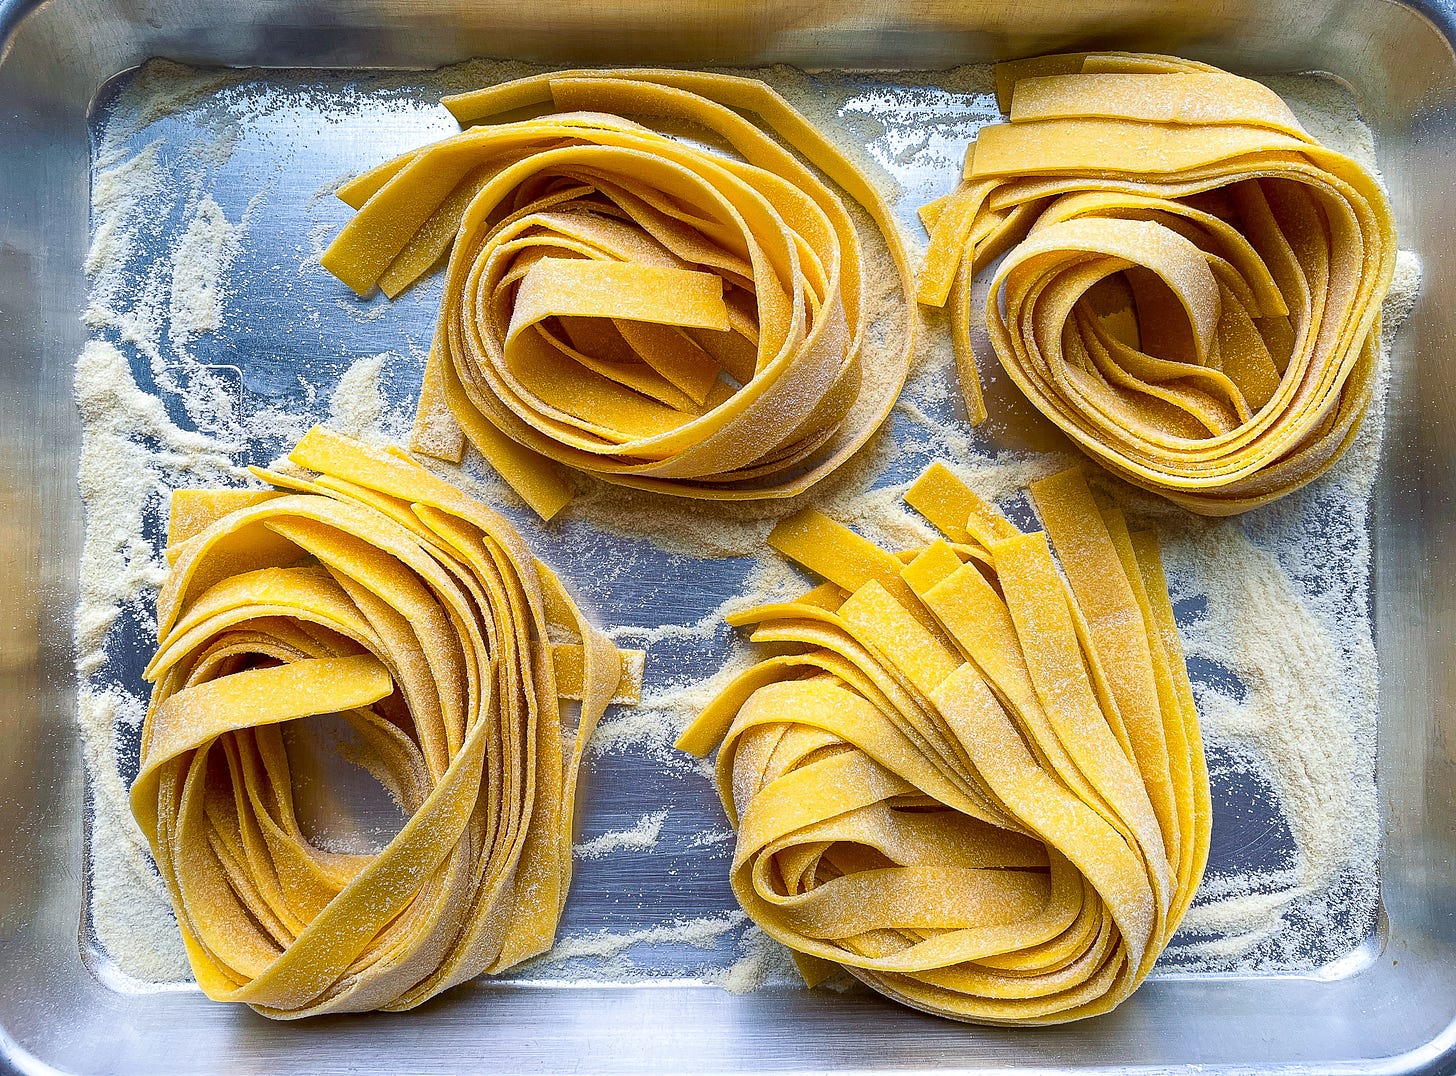
Once your dough has rested, set up your workspace and pasta machine. Dust a sheet pan or tray with semolina flour, or line it with a clean, dry dish cloth.
Cut off a quarter of the dough and re-wrap the remainder.
On your work surface, flatten the section of dough with the heel of your palm into an oval-shaped pancake that’s about ¼-inch thick. Press the dough between your fingers to flatten it as needed.
Roll the dough into sheets:
Set your pasta roller to its widest setting. Position one tapered end of the oval in the center and roll it through once—you should be left with a longer, thinner oval.
Position the dough lengthwise on your work surface. Then fold the two tapered ends into the center like an envelope so the length is the same or similar to the slot of the pasta roller (about 6 inches; it doesn’t matter if the ends overlap or if there’s space between them). Flatten the dough again with your palm/fingers so it’ll go through the machine easily.
Line up the bottom edge of the pasta envelope with the edge of the machine (the folded tapered ends should run horizontally). Roll the dough through the machine on the same (widest setting) a second time—you should be left with a rectangular-ish piece of dough (it’s okay if the ends aren’t perfect!).
Continue rolling the dough through the machine one time on each progressive setting until you have a thin (but sturdy) sheet—this is usually setting 6 on my Marcato Atlas and KitchenAid machines.
If the dough feels sticky or tacky as you roll, dust both sides with some ‘00’ or all-purpose flour.
Dry the pasta, briefly:
If the sheet is very long, cut it in half crosswise. Then let the sheet(s) air-dry on a wooden surface or your semolina/towel-lined sheet pan until they’re no longer tacky to the touch but still pliable, about 5 to 10 minutes per side. While the sheets dry, roll out another portion of dough.
Dust the slightly dried pasta sheets with ‘00’ or all-purpose flour on both sides, spreading it around and removing any excess. Then sprinkle the surface with semolina flour.
Cut the pasta: Cut the pasta using the machine’s cutter attachment if you have one or cut the fettucine by hand (see below).
Arrange the fettucine into small, loose nests or fold the strands into wallet-style upside-down Us. If the pasta still feels tacky, sprinkle it with a little more semolina.
Repeat with the remaining pasta sheets. Cook the fettuccine as soon as you can and shake out any excess flour right before dropping it into the water.
Storage
Since you’ll only need half of the pasta for this recipe, I suggest freezing the rest. Pop the tray with the remaining pasta nests in the freezer, uncovered, until solid, about 20 to 25 minutes. Then carefully transfer the solidified nests to a freezer-safe bag or container and return to the freezer for up to 3 months. Cook straight from frozen—drop the nests into salted boiling water, wait a few seconds, then use tongs to gently stir until the strands release.
To cut the pasta by hand:
Position the pasta sheet lengthwise on your work surface.
Fold the two shorter ends inward until they meet in the middle. Sprinkle the pasta with a little more semolina, then fold the ends in one more time—you should have a tight, scroll-like packet.
Rotate the pasta packet 90 degrees and cut across, mirroring the center line, at about ¼-inch increments (mine are a little wider).
Slide the spine of your knife under the packet so it aligns with the center line.
Lift the knife and let those strands of fettuccine fall!


